Fact file:
Matriculated: 1902
Born: 10 August 1883
Died: 3 November 1918
Regiment: London Regiment (Queen’s Westminster Rifles)
Grave/Memorial: Little Bookham Churchyard, Surrey.
Family background
b. 10 August 1883 in Cobham Lodge House, Cobham, Surrey, as the only son (four sisters) of Herbert Helme (1851–1933) and Annie Helme (née Chater) (1852–1943) (m. 1876). At the time of the 1891 and 1901 Censuses the family was living in Cobham Lodge House (with seven and six servants respectively), and at the time of the 1911 Census the family was living at The Lilt House, Cobham (four servants). By the time of Thomas Herbert’s death it had moved to “Downside”, Salvington, West Worthing, Sussex.
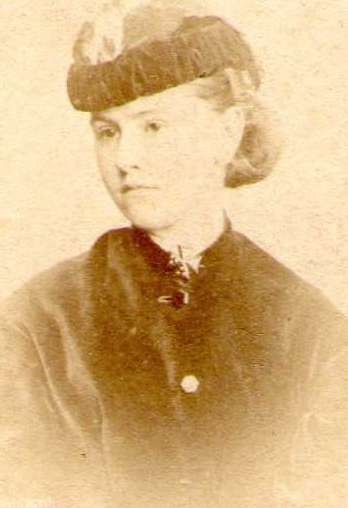
Annie Chater (1852-1943)
Parents and antecedents
Helme’s father Herbert was the fifth child (third son, of seven children) of Thomas Mashiter (né Helme), JP (1804–96), referred to here as Thomas [IV]. From which it follows that Herbert was the younger brother of Edward Thomas Mashiter (né Helme) (1842–1921), and George Mashiter (né Helme) (1843–1927), both of whom will be discussed in more detail below. Thomas [IV] later described himself as a “Merchant of Romford”, in Essex, and he was the fifth son of Robert Helme (1753–1830) of Walthamstow, making Robert the grandfather of Herbert Helme and his brothers and the great-grandfather of Thomas Herbert Helme.
As the above confusion of transferred and inherited surnames suggests, the story of the Helme family from the late eighteenth to the early twentieth century is complicated, and needs quite a bit of unravelling, but at its centre is the name Mashiter. According to Charles H. Whitwood’s fascinating article (see Bibliography below), the name Mashiter can be traced back to the late fifteenth century at least and was probably originally a nickname for someone who steeped malt, since the word “mashiter”, meaning a rudder, referred to a rudder-like paddle that was used for stirring the mash during the production of beer and ale. In about the third quarter of the eighteenth century, William Mashiter [I] (1744–1811) of Bolton-le-Sands, Lancashire, a county where various forms of the same name are still current, migrated to London and became a wharfinger at Irongate Wharf, on the northern bank of the Thames and just downstream from the Tower of London. A wharfinger was the equivalent of a modern harbour-master and would have had an office on the wharf from which he managed it and exercised his responsibility for the goods that passed through it. In around 1778, i.e. when he had established himself and, presumably, made enough money to contemplate matrimony, William [I] married his cousin Blandina(h) Mashiter (1742–1834), the second daughter of Thomas Mashiter [I] of Romford, Essex (1695–1778), who also described himself as a merchant. Whitwood’s essay traces in great detail William [I]’s continuing rise in wealth, importance and influence after his marriage, in both London and the Liberty of Havering, which included Romford. Here, for example, he and Blandina(h) acquired “Cottons”, an eighteenth-century house on the London Road which complemented the one they owned in East London, just behind Irongate Wharf, where one of their four sons was born. The Mashiters’ house was in the parish of St Katharine’s by the Tower, whose church had been founded by royalty in 1147 as a religious community and hospital for the poor. Although the church was demolished in 1825 to make room for the much-needed St Katharine Docks, its name still lives on in St Katharine’s Way and St Katharine’s Pier (both E1).
According to Whitwood, two of William [I] and Blandina[h]’s sons (William [II], 1777–1814, and Cuthbert, 1779–1795)
moved away from western Essex. But like their father, the other two – Thomas [II] (b. 1779 in Romford, d. 1862) and Octavius (1783–1875) – stayed and became prominent in the Liberty of Havering. When William [I] apprenticed Thomas [II] in 1794, he himself was described in the articles of apprenticeship as a “citizen and Bowyer [bowmaker] of London”. This does not mean that William [I] literally worked as a bowmaker, but that he had been elected and admitted to the Freedom and Liberty of the Bowyers’ Company, one of the older and smaller of the City’s livery companies, which had been founded in the fourteenth century to make longbows for the French Wars but was, some 400 years later, mainly concerned with charitable activities. William [I] was admitted on 20 July 1780 and gradually rose up the Company’s hierarchy, becoming an Assistant in 1788, the Renter Warden in 1796, and the Company’s Master on 16 April 1800.
Thomas [II] and Octavius seem to have acquired property as an investment, thereby contributing indirectly to the early nineteenth-century development of Romford. In 1814 Thomas [II] married Betsy Parker (1798–1860), and in 1815 Octavius, who was also prospering, married his cousin Maria Tyler (1793–1878), and moved into “Priests”, Romford, a new property with an estate of 23 acres at the foot of Mashiters Hill (formerly Mowbray’s Hill) that was just north of what is now the North Circular Road (A12) and half-way between the centre of Romford and Havering-atte-Bower. From 1828 until his death, Thomas [II] held the position of the High Steward of the Liberty of Havering-atte-Bower, the most important position in the locality, and both he and Octavius were Commissioners for taxes and members of the Romford Bench of Magistrates. Thomas [II] was a Justice of the Peace from c.1829 to at least 1847 and Octavius is on record as having been “an active and diligent Magistrate for thirty-three years”. The two brothers were also Trustees of the Roger Reede Almshouses in Church Lane, on the eastern edge of Romford and a few hundred yards south of Mashiters Walk, which had been set up as a charity in 1483 “for the benefit of Poor Men of Good Character unable to maintain themselves by their own exertions through age, ill-health or infirmity”. Moreover, on 15 June 1833 the two men became Trustees of Romford’s Charity School (founded in 1710 and the precursor of the modern St Edward’s School).
Thomas [II] and Betsy produced no children but Octavius sired five, the oldest of whom was Thomas [III] (1816–88). Described as “a merry soul”, Thomas [III] never married but lived the life of a bluff rural squire, dressed like the allegorical John Bull (who had become popular in the 1760s and voted to leave the European Union in June 2016), and enjoyed a reputation for toughness in Essex hunting circles. Octavius and Maria also had three daughters, none of whom married, and a second son, William [III] (1819–98), who probably became a barrister and married Georgina Margaret Mary Malden (1824–84) in 1857. William [III] lived in “The Elms”, on Romford’s main road, and was particularly involved with the foundation and construction of Romford’s Victoria Cottage Hospital which was opened in 1888 to celebrate Queen Victoria’s Golden Jubilee (20 June 1887). But he, too, was childless, and so, according to Whitwood, the line begun by William [I] and Blandina[h] came to an end with their five grandchildren.
In 1794, Lowndes’s London Directory listed a firm of Nail Merchants called Mashiter & Helme who were based at Irongate Wharf (see above), and during the nineteenth century the two families seem to have grown closer together. This development was of considerable significance for the Helmes because, when Thomas Mashiter [II] made out his complicated will, he seems to have decreed that if his elder brother William [II] had no issue, then the Helmes were to inherit the Mashiters’ not inconsiderable estate provided that they adopted the surname of Mashiter. As far as we have been able to ascertain, Thomas Mashiter [IV] (né Helme), JP (1804–96), his eldest son Edward Mashiter (né Helme) (1842–1921; educated at Winchester) and his second son George Coope Mashiter (b. 1843 at Warley Lodge, Warley, Essex, d. 1927; educated at Winchester and the Royal Military College, Sandhurst; later Colonel Sir George) were the only three members of the Helme family who accepted this stipulation and acquired the requisite royal licences, in 1884, 1899 and 1922 respectively (London Gazette, no. 25,365, 17 June 1884, p. 2,645; no. 27,060, 7 March 1899, p. 1,587; no. 32,576, 13 January 1922, p. 369).
In 1874, George Coope Mashiter married Florence Sophia Pearson (b. 1847, d. possibly in Australia), the second daughter of the Reverend John Pearson, MA (c.1805–1882) and Frances Harriet Pearson (1810–52) (née Brown) (m. 1832), but they had no children. John Pearson was an alumnus of Trinity College, Cambridge, and the Rector of East Horndon and Little Warley (about six miles east of Hornchurch and three miles south of Brentwood) from 1837 to 1877, when he retired to Eastbourne because of failing health, and, from June 1845 to 1873, the Rural Dean of Billericay. According to an obituarist: “As a parish clergyman he did much good work in a quiet and unostentatious manner, and he also acted efficiently as a diocesan Inspector of schools.” He became an Essex magistrate in April 1839 and a member of the Brentwood bench, which he chaired for several years, took “a deep interest in the County Lunatic Asylum”, and was a Commissioner of Income, Land, and Assessed Taxes for the districts of Barstaple and Chafford.
At some point, Thomas Mashiter [IV] had been a brewer – we do not know exactly where but probably in Surrey – and from some time in the 1850s until his death in 1896 he and his family had lived in the Manor House at Little Bookham, Surrey, some four miles south of the village of Cobham, where his third son Herbert would reside with his family after he had left the East India Company and settled in England during the 1880s. In 1841 Thomas Mashiter [IV] married Susan Emily Coope (1819–78), the second daughter of John William Coope (1766–1845) and Anna Maria Doorman (1781–1861) of London. John William and Anna Maria were also the parents of George Coope (1824–63) and Octavius Edward Coope (1814–86; later Conservative MP for three constituencies: Great Yarmouth (1847–8) – forced to resign because of “gross, systematic and extensive bribery” during the 1847 elections – Middlesex (1874–85), and Essex (1885–6)). In 1848 Octavius Edward Coope married Emily Fulcher (b. 1824 in the Cape of Good Hope, South Africa, d. 1908), the daughter of an officer in the Indian Army, and they had a daughter. Octavius became the Director of two large and successful insurance companies, and when Ind Coope & Co. Ltd was established as a Limited Liability Company on 13 November 1886 (see below), he became one of its first Directors and its first “permanent Chairman” – but only for two weeks as he died on 27 November. From c.1851 until his death, Octavius and his family lived in “Rochetts”, South Weald, a couple of miles west of Brentwood, Essex, a large manor house with a medieval hall that was largely destroyed by fire in 1975, and he is buried in the graveyard of South Weald’s large parish church.
Thomas [IV] moved to Essex in 1862 on the death of Thomas [II], having inherited Hornchurch Lodge, a sixteenth-century building on Church Hill, Hornchurch, just over two miles south-east of Romford, where, according to Whitwood, Thomas [II] and his family had lived between c.1820 and Thomas [II]’s death. Once in Essex, Thomas [IV] became prominent in the county’s agricultural affairs for many years and was a “well-known and active member of the Essex Agricultural Society”. A major consequence of Thomas [IV]’s move to Essex was that he and at least one other member of his family became involved in the running of the increasingly successful Ind Coope & Co. Brewery in South Street (The High Street), Romford, Essex (just to the north of the railway station; closed and demolished in 1993). The Ind Coope brewery had developed out of the Star Inn, South Street, Romford, which had been founded by George Cardon (no dates available) in 1708 and was equipped with its own micro-brewery. In 1799 the inn and its brewery were acquired by John Grosvenor (c.1756, date of death unknown) and Edward Ind [I] (1779–1845), who renamed the firm “Ind & Grosvenor, brewers and maltsters”.
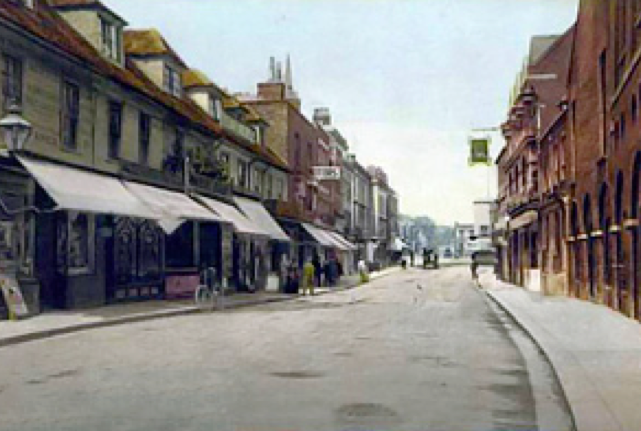
The Star Inn (on the left of the street) and the Ind Coope Brewery (on the right) in Romford in c. 1900. The photographer took the photo facing north and with his back to Romford railway station (opened 1839). South St (The High St) is now a cul-de-sac with no view of the church in the distance and the site is covered by a huge shopping complex.
Edward Ind [I] was the son of James Ind (1753–1810), a Hertfordshire maltster, and both he and his father were members of a family of brewers who operated from Cambridge and Baldock, Hertfordshire. In 1811 Edward Ind would also acquire the Baldock Brewery in White Horse Street when his younger brother – James Jr (1788–1811) – was killed in a riding accident. Edward [I] and Grosvenor enlarged the Romford brewery, and when John Grosvenor retired in 1816, he dissolved his partnership with Edward and sold his interests to John Smith (not to be confused with the Tadcaster Brewer (1824–79)). Business flourished and by the early 1830s the brewery was exporting beer to Australia and Edward had started to become a prominent public figure in Romford. Together with Thomas [II] and Octavius Mashiter he was a Commissioner for taxes; he also sat with them as a Romford magistrate for a good 20 years, and he was Thomas [II]’s Deputy Steward of Havering-atte-Bower from 1828 to 1836. Just to complete the picture, he would have gained the entrée to the Coope family via Thomas [IV]’s wife and her brothers Octavius and George (see above). 1845 was a particularly significant year for the company: the partnership between Ind and Smith was dissolved in April; Edward Ind [I] went into partnership with Octavius Edward Coope; George Coope joined the firm; John Smith sold his interests to Octavius and George Coope; and Edward Ind [II] (1829–94) took control of the firm following his father’s death in that year. The firm’s name was changed to Ind Coope & Co. and both Octavius and George would become increasingly key members of the company.
At some point, Thomas [IV] served as a member of the new company’s Board of Directors, and when Ind Coope & Co. became a Limited Liability Company on 13 November 1886, his son Edward Thomas (1842–1921) became one its first Directors and, eventually, the Chairman of its Board of Directors. Edward had moved to Essex with his family in 1862 and in 1867 he married Augusta Hawkins (1843–95), the only daughter of the Reverend Henry Annesley Hawkins (1813–91), the Vicar of Topcliffe-on-Swale, Yorkshire, and his first wife Harriet Emma Hawkins (née Hale) (d. 1843, probably in childbirth) (m. 1838). Edward and his family then lived in Hornchurch Lodge for c.30 years, and during this period he, too, became a prominent member of City of London and Essex society, where he was “specially concerned with the sporting life of the county” and hunted regularly with both the Essex and the Essex Union’s packs. From 1877 to 1891 he was Secretary of the Essex Union Hunt and from 1898 to 1909 its Master of Hounds; and in 1880 he was elected Master of the Worshipful Company of Grocers, another London Livery Company. In 1890 he and his family moved from Hornchurch to How Hatch, near South Weald; in 1895 they moved to Warley Side, Great Warley, a few miles to the south. From 1896 to 1899 they lived in Gatwick House, an eighteenth-century red-brick house that stands on rising ground in a small park in Great Burstead, Essex, immediately south of Billericay, where, also in 1899, he became a JP and the Chairman of the Billericay Bench. In 1911 Edward Thomas married his second wife, Dorothy Helsham-Jones (1875–1959).
While all this profitable commercial activity was going on, Helme’s father Herbert was educated at Eton from c.1864 to 1868 and at Merton College, Oxford, from c.1868 to 1872 (BA 1873). He rowed in Merton’s first VIII throughout his time there and represented Oxford against Cambridge in the mile race in 1872. But instead of going into the brewing industry, in which, by now, his family occupied a respected place, he seems to have begun his working life with the East India Company. He also seems to have left it in the 1880s, for in the 1881 and 1891 Censuses he gave his profession respectively as “East India Merchant” and then as “Retired East India Merchant, Commission Agent”, for by then he was a partner of J.F. Aldridge & Co., a London-based firm of East India Merchants. Even after his semi-retirement he had nothing to do with the brewery trade and seems to have favoured work that had greater public benefits. By 1892 he had become a Member of the Board of Management of the British Home and Hospital for Incurables that was set up in 1861 in Clapham, London SW4, to look after “members of the Middle Classes – people of education, culture and refinement […], who, but for this Society, would be helpless, hopeless and homeless”. In 1892, after 30 years in Clapham, the hospital moved to Crown Lane, Streatham, London SW16 and it was granted the Royal Charter in 1899.By 1911 Herbert had become one of the hospital’s Stewards.
In the 1901 Census he described himself for the first time as “Director of East London Waterworks” even though he had held the post since 1888 and would hold it until 1902. In that year, following the recommendations of a Royal Commission of 1899, the Metropolitan Water Act amalgamated nine private water companies into the Metropolitan Water Board (1903), thus centralizing the control of water quality and supply throughout the entire London area after a century of opposition to such a move on the part of the Home Counties. As a result of the new legislation, Herbert lost his directorship but received £4,000 by his father in compensation for this. On 26 March 1909 Herbert was elected a member of the Foundation School Committee of St John’s, a private school for the sons of poor clergy that had been established in 1851 in St John’s Wood, London NW8 and had moved to Leatherhead in Surrey in 1872, a mere five miles away from the Helme family home in Cobham. The School Committee was similar to a Board of Governors, but as St John’s was a charitable foundation, it was dependent for funding on donations and legacies, and until 1930, the many people who subscribed were known as Governors and were entitled to use their votes to elect pupils to the Foundation. Herbert Helme resigned from the Committee on 24 January 1913, having taken considerable interest in the school: he attended Speech Day in July 1909, July 1910 and July 1911, and on 5 April 1911 he presented the medals and the miniature rifle-shooting cups at the school’s inter-house gymnastics competition. By 1911 he had become a JP for Surrey. Herbert Helme occasionally published articles on the habits of British Birds in the Badminton Magazine and gave his recreational activities as Natural History, shooting, beagling, croquet and otter hunting (now illegal in England and Wales since 1978); when he died he was not that well off, for he left only £3,573 (£132,000 in 2005), and when his widow died in 1944 she left only £668.
Herbert’s wife, Helme’s mother Annie, was the second daughter of Henry Chater (1827–87), a glass and lead merchant, and Mary Chater (née Pilkington) (1824–95) (m. 1850), the daughter of William Pilkington (1800–72) who, with his brother Richard Pilkington (1795–1869), was one of the founding shareholders in Pilkingtons, the famous glass manufacturer. The company was founded in c.1826 as a partnership between the Pilkington and Greenall families of St Helen’s, Lancashire, and was renamed Greenall and Pilkingtons in 1829. But when Peter Greenall (1796–1845), William Pilkington’s brother-in-law (husband of Eleanor Pilkington (1798–1836; m. 1821)) and the last member of the Greenall family to be a member of the firm, left it in 1845, it became known as Pilkington Brothers. By 1903 the firm was the sole producer of flat glass in Britain and in 2006 it was taken over by Nippon Sheet Glass of Japan.
Henry Chater (1827-87)
Siblings
Brother of:
(1) Beryl May (1876–1960);
(2) Emily (“Emie”) (1878–1977);
(3) Vera (1881–1967);
(4) Eleanor Edith (1888–1967).
As far as we have been able to ascertain, none of Herbert’s four sisters married.
Education and professional life
From c.1893 to 1897 Helme attended Ashdown House Preparatory School, Forest Row, East Sussex (founded 1843 in Brighton as Connaught House School; cf. E.I. Powell). It was also known as Mr Lees’s School after its founder William Randall Lees (c.1825–1897) and moved to its present position in c.1890. Helme then attended Eton College from 1897 to 1902, where he became a Corporal in the College’s Volunteer Rifle Corps and won the School Shield for Double Raquets in 1902. He matriculated at Magdalen as a Commoner on 20 October 1902, having passed Responsions in Trinity Term 1902. He took the First Public Examination in the Hilary and Trinity Terms of 1903, plus an Additional Paper in Classics. He then read for an Honours Degree in Modern History, was awarded the Johnson Exhibition, and was awarded a 4th in Trinity Term 1905, after which he took his BA on 9 November 1905.
After leaving Magdalen, he joined Barclays Bank and until at least 1911 he worked as a Local Director’s Assistant in the Head Office in Collingwood Street, Newcastle-on-Tyne, where he rented a room at 8 Malvern Street, a mile west of the city centre, in the house of Noah Pritchard, a market gardener. Newcastle-on-Tyne was one of a network of Local Head Offices (LHOs) that were set up by Barclays following the merger of 20 banks in 1896 which created the modern company. Newcastle LHO was established in 1897 when Barclays acquired Woods & Co., a prosperous private bank. Each local District had a local Board of Directors, each of which enjoyed delegated authority from Barclays’s main Board of Directors. By August 1914 Helme had, however, returned to London, where he worked in the inspection department of its LHO at a salary of £350 p.a. When war broke out, Barclays undertook to pay his full salary for six months, but once it had become clear that hostilities would go on beyond 1914, they altered this payment to full pay less service pay, and in March 1915 this payment was reduced to half-pay with no deductions. But special cases of hardship – of which Helme was not an example – could be referred to the local Boards of Directors, and they had expressed themselves “anxious to deal with such cases on liberal terms”. So from January to March 1915 Helme’s officer’s pay amounted to £136 17s. 6d p.a., which Barclays made up to the pre-war level by paying him a supplementary salary of £213 2s. 6d p.a., and after that, the supplement would have amounted to £175 p.a.
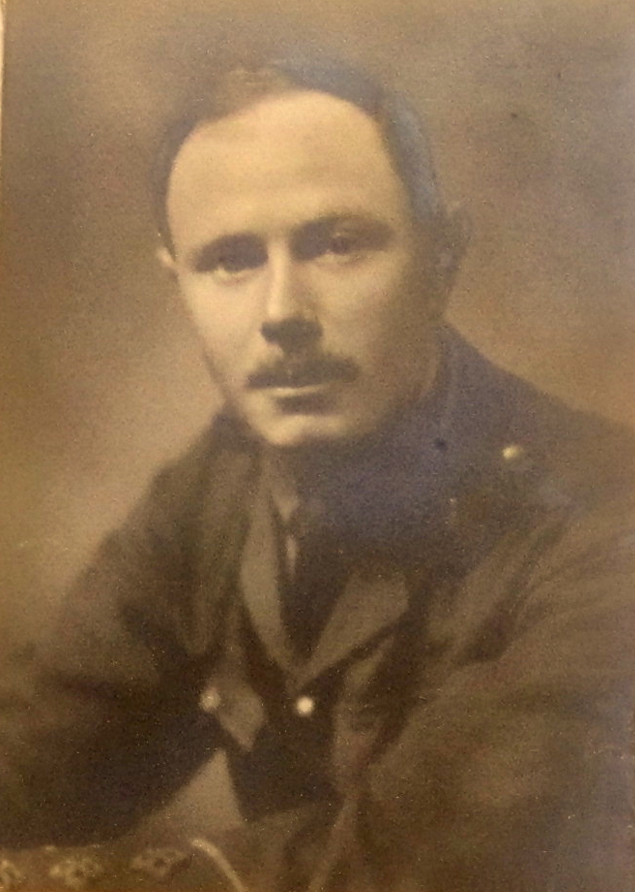
Thomas Herbert Helme, BA
(Photo courtesy of Magdalen College, Oxford).
War service
Helme was 5 foot 9 inches tall and on 19 November 1914 he applied for a Territorial Commission in the 2/16th (County of London) Battalion (Territorial Force), The London Regiment (Queen’s Westminster Rifles), that had been formed at 15 Buckingham Gate, London SW1, as part of the 2/4th (London) Reserve Infantry Brigade, in the 2/2nd (London) Division. The Division then trained for over a year in London itself, followed by Surrey (Dorking and Reigate), Kent (Maidstone), Hertfordshire (St Alban’s and Watford) and finally the Essex/Hertfordshire border, where Helme’s Brigade was sent to Saffron Walden. Between June and October 1915 most of the Division were under canvas, but in order to prevent damage to growing crops, off-road tactical exercises were prohibited until after the harvest was in.
In November 1915 the camps were broken up and the units returned to billets near Bishop’s Stortford, Saffron Walden and Ware until the third week of January 1916. The Division was then moved to Longbridge Deveril, Wiltshire, near Salisbury Plain and two-and-a-half miles south of Warminster, with Major-General (later Lieutenant-General Sir) Edward Stanislaus Bulfin (1862–1939) as its General Officer Commanding (GOC) from 22 December 1915 to late July 1917. Once here, the Division was reclassified as the 60th Division and its constituent infantry Brigades were renumbered as the 179th, 180th and 181st Brigades, with Helme’s Battalion in the 179th Brigade. Bulfin noticed, when drawing up more intensive advanced training schedules, that the Territorial ORs (other ranks) were superior in several respects to their Regular counterparts, possessing an “extraordinary quickness, intelligence, and alertness”, and that the Territorial officers, though equally quick on the uptake, needed more professional training; he also noticed that a large number of the recruits, especially those from London, were medically unfit. Conversely, when, in May 1916, a large draft of 3,000 men from Yorkshire and the Midlands arrived, they were observed to be significantly fitter than many of the Londoners.
On 9 April 1916, Helme was gazetted Captain and Adjutant of his Battalion (London Gazette, no. 29,598, 29 May 1916, p. 5,310), and on 28 April 1916, while the Easter Uprising in Dublin (24–29 April 1916) was beginning to spread to Cork and the south-west of Ireland, the 179th Brigade, beginning with Helme’s Battalion, was suddenly sent to Southern Ireland on security duty. It embarked at Neyland, Dyfed, part of the port of Milford Haven, late on the following day, and on 30 April arrived at Queenstown, County Cork (now Cobh), where it discovered that the uprising had collapsed when the Sinn Feiners heard that troops were on their way. So the Battalion stayed for nearly a week under canvas on Fota Island, in Cork Harbour, and after accepting the surrender of a Battalion of insurgents in Limerick on 5 May, it spent three days searching for local rebels and hidden arms without much success. On 10 May the Brigade received orders to return to England and on 18 May it was back at Sutton Veny, two miles south-east of Warminster.
By now, General Bulfin was receiving favourable reports on the 60th Division from various inspecting Generals and soon heard that it should prepare itself for a move to France in mid-June. So identity discs, field dressings, and active service pay books were issued, and the men were given inoculations and vaccinations and four days embarkation leave. On 31 May the entire Division was inspected near Warminster by King George V, who “expressed himself as highly gratified with the turn-out and bearing of the troops”. On 14 June the official orders arrived at Divisional Headquarters: the move took place on 21/22 June 1916, and on 23 June the 2/16th Battalion, consisting of 31 officers and 973 ORs, landed at Le Havre, followed by the 180th Brigade (23 and 24 June) and the 181st Brigade (24 and 25 June). By 27 June the entire Division had landed safely and by 29 June 1916 it had moved from the rest camp at Le Havre to the rear of the front line at Arras, c.131 miles to the north-east, and was starting to take over there from the 51st (Highland) Division, with its three Brigade HQs at Écoivres, Mont-St-Eloi, and Étrun.
From 29 June to 5 July 1916, Helme’s Battalion was attached to the 1/6th Battalion of the Black Watch for training in the trenches, and after a week in billets at Maroeuil, a village around three miles south-west of Neuville-St-Vaast, the 60th spent the period from 11 to 16 July in the front-line trenches – with the 181st Brigade holding the right sector, the 179th Brigade holding the central sector in front of the ruined village of Neuville-St-Vaast, and the 180th Brigade holding the left sector. The Germans had no difficulty observing all three sectors from their trenches on Vimy Ridge and they bombarded them frequently, starting with the period when the Divisional handover was taking place and causing the Division’s first casualties. The ground beneath the trenches was honeycombed by old and new mine galleries and no-man’s-land was pitted with huge mounds of debris that had been thrown up by mine explosions. Systematic raids on the German trenches for the purpose of intelligence gathering began on 6 August and took place on 7, 12, 24, 28 and 30 August, with varying degrees of success; August also saw a good deal of mining activity and crater fighting. The raiding, mining and fighting continued in September and on the night of 23/24 September Helme’s Battalion undertook a short, sharp and successful raid, during which five Germans were taken prisoner. The 2/16th Battalion then stayed in the same stretch of trenches until 7 October, spent six days in nearby huts, and then returned to the trenches until 24 October. The Battalion’s last raid was undertaken on 14 October and five days later, on 19 October, the news came through that 60th Division would be relieved by the 3rd Canadian Division between 23 and 26 October.
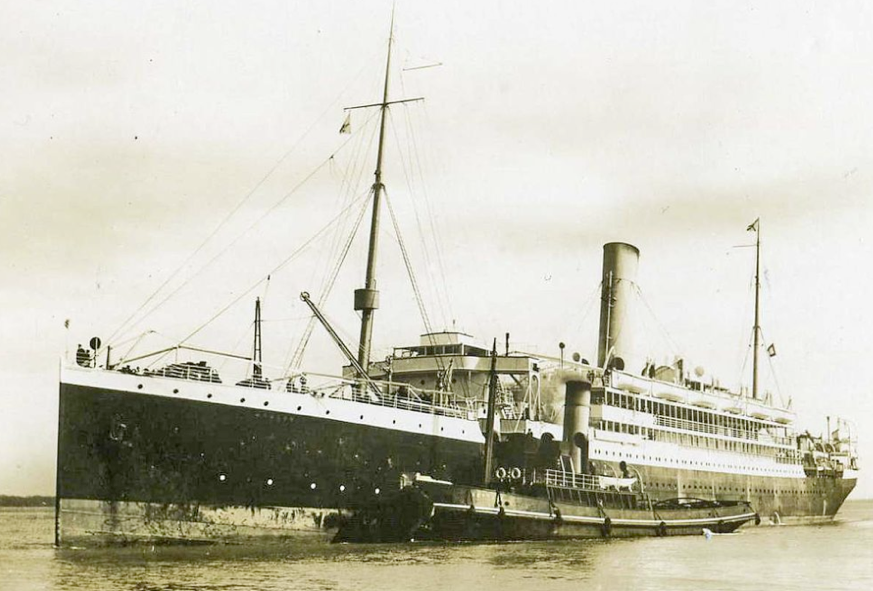
So on 25 October, the 2/16th Battalion, together with the rest of the 60th Division, began a 42-mile route march south-westwards to Bellancourt, some four miles south-east of Abbeville, with a period of training en route between Ribeaumont and Domesmont (30 October–3 November 1916), and probably arrived at their allotted destination on 4 or 5 November. On 1 November the Divisional HQ had received formal notification that the 60th Division was to travel by sea from Marseilles to the Salonika front in order to fight the Bulgarians. The first elements of the Division entrained for Marseilles at the village of Longpré-les-Corps-Saints, about 12 miles south-east of Abbeville, on 14 November 1916, Helme’s Battalion followed on 15 November, and the business of loading continued there until 25 November – very slowly, it seems, because of very bad weather, lack of proper loading facilities, and the non-arrival of trains. But at last, on 19 November, the 2/16th Battalion, with a total of 35 officers and 883 ORs, embarked on the converted liner HMT Transylvania (1914–17; torpedoed by the U-63 at 10.00 hours on 4 May 1917, when two-and-a-half miles south of Cape Vado in the Gulf of Genoa en route from Marseilles to Alexandria, with the loss of 412 lives).
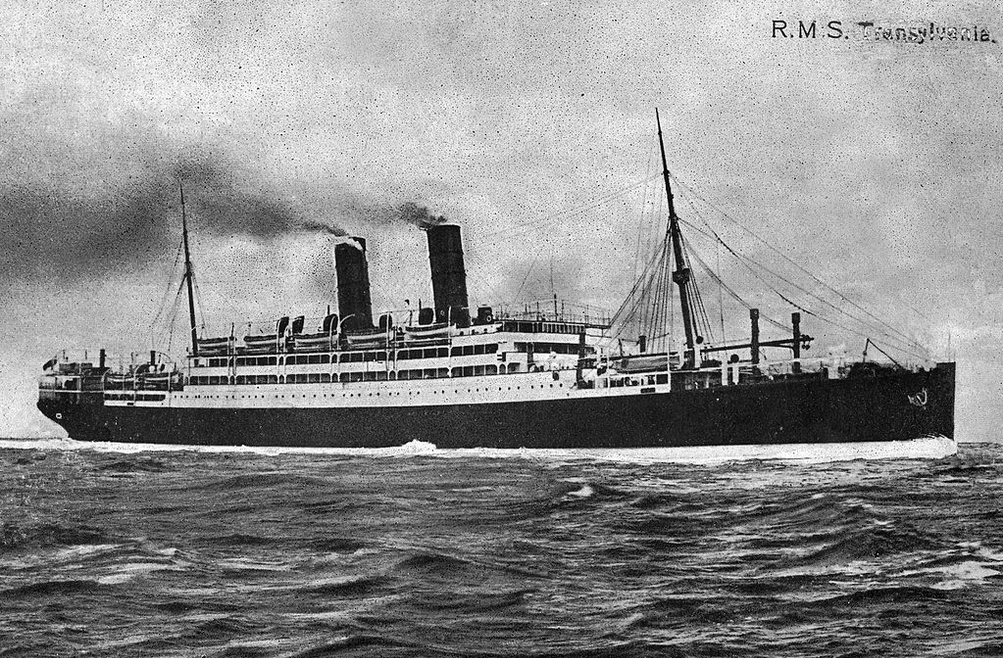
HMT Transylvania (1914-17).
* * * * * * * * * * * *
Excursus on the war in northern Greece from September 1915 to December 1916
While waiting for a train on a draughty station in northern France on a cold winter’s day in 1915, many a British soldier must have welcomed the prospect of going somewhere which was further south and reputedly warmer. But many must also have asked themselves why on earth they were being sent to northern Greece. And because the Macedonian campaign has received so little public discussion, it is useful, at this juncture, to continue the narrative by trying to explain the tangled historical events that led up to the decision to send the 60th Division to the Salonika front.
Macedonian theatre of War
From the very beginning of the war, the Western Allies, who were pro-Serbian and had effectively controlled the shape of the Balkans since supervising the Treaty of London (30 May 1913), were concerned to prevent Bulgaria from renewing its hostilities with Serbia in the hope of making territorial gains. But by September 1915 it seemed to them that the only way of doing this was to put on a show of force by landing an Anglo-French Expeditionary Force at a conveniently located deep-water port in the northern Mediterranean. Unfortunately, the only town that fitted such a purpose was Salonika (Thessaloniki), the capital of Greek Macedonia in the north-east of Greece, a country that retained its official neutrality until 30 June 1917. So in September 1915 an Anglo-French Expeditionary Force – which the French called the Armées alliées en Orient – with the left-leaning French General Maurice Sarrail (1856–1929) as its Commander-in-Chief from January 1916 to December 1917, was hastily put together. It initially consisted of two depleted units that had been withdrawn from the failing campaign against the Turks on the Gallipoli Peninsula – the 10th (Irish) Division, commanded by General Sir Bryan Mahon (1862–1930) and the French 156th Division (see A.F.C. Maclachlan). Although the force landed at Salonika on 5 October 1915, by this juncture the gesture was of little use since an Austro-German force invaded Serbia on the following day, and eight days later, on 14 October 1915, this latter force was reinforced by Bulgaria’s declaration of war against Serbia.
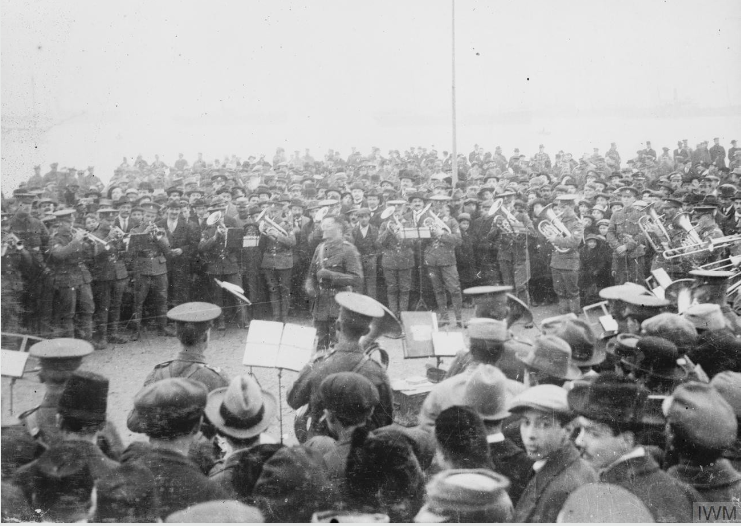
British Regimental Band playing on the seafront at Salonika (February 1916)
(© Imperial War Museum Q31729)
But Greece’s neutrality, far from testifying to a sense of national unity, disguised a deep political rift, for King Constantine I (1868–1923; King of Greece 1913–17 (abdicated in June) and 1920–22) was pro-German, having been educated in Germany. He was also married to the Kaiser’s sister Sophia of Prussia (1870–1932), and was very popular with a large proportion of his subjects because of his success in ending the Second Balkan War with Bulgaria (16 June–18 July 1913) and doubling the size of Greece. In contrast, his Prime Minister, the liberal-democratic Eleftherios Venizelos (1864–1932; Prime Minister of Greece 1910–20 and 1928–33, with interruptions), was in favour of entering the war on the side of the Allies and had given his permission via a secret agreement for General Sarrail’s Expeditionary Force to land in Salonika in October 1915 – for which he was dismissed by King Constantine on 5 October. Nevertheless, by 21 October 1915 French troops were clashing with the Bulgarians in the valley of the River Vardar (River Axion) north-west of Lake Doiran, c.40 miles north-north-west of Salonika. Because the Greek Government was still controlled officially by supporters of King Constantine, General Mahon was unable to move elements of the 10th Division north-north-westwards from Salonika until 22 October 1915, when he was finally allowed to advance as far as the Greek–Serbian frontier and support the French.
By the end of November 1915 the French were succumbing to
pressure from the Bulgarian Second Army – which was invading Greece from the east – and so were preparing to withdraw southwards. And by 29 November 1915, extreme weather conditions, sickness from the Dardanelles campaign (especially dysentery), poor food, insufficient supplies, thin tropical kit, frostbite and the bleak inhospitality of the landscape were forcing the British to think about doing likewise. On 7 December the Bulgarian Second Army hastened that decision by attacking the British positions along the Kosturino Ridge, about eight miles north of the border between Greece and Macedonia, but at that time part of the Kingdom of Serbia, forcing them to retreat to the Dedili Pass where they were required to hold the road until the French had passed along it towards the railway station at Doiran. The Battle of Kosturino ended on 12 December, with the Allies declaring that they had lost. By 20 December 1915 all the survivors of the French Expeditionary Force and the British 10th Division had reached Salonika, where they would learn that thousands of French reinforcements and four new British Divisions had arrived in Salonika from Marseilles or were on their way: the 22nd (arrived October–November 1915), the 26th (arrived November 1915), the 27th (arrived November 1915; see Maclachlan), and the 28th (arrived
November 1915–January 1916).
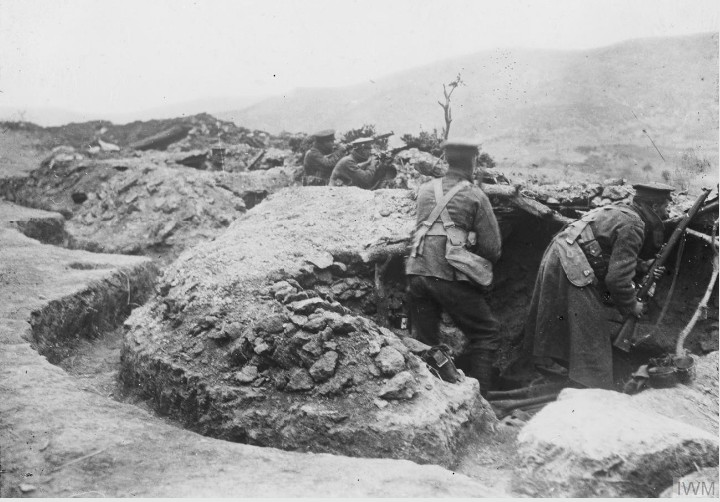
Infantry manning part of the 10th (Irish) Division’s line on the Kosturino Ridge, (December 1915)
(© Imperial War Museum Q62996)
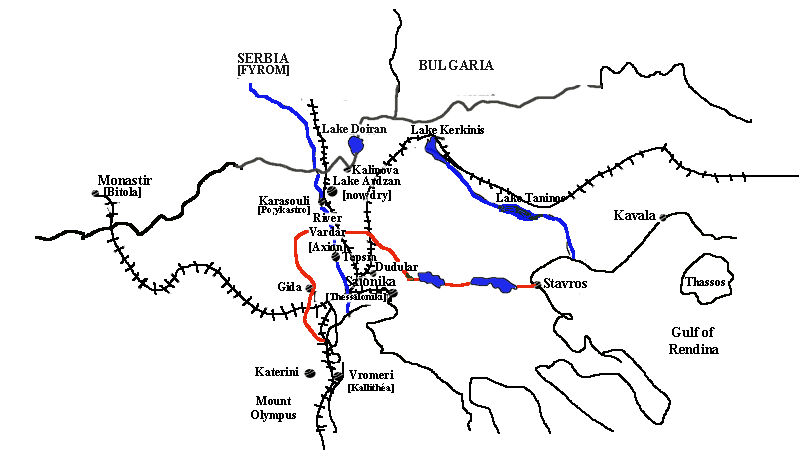
Moreover, during the abortive French campaign further north, General Sarrail had been given permission by the Greeks to build a defensive line around Salonika, albeit in bitter winter conditions, which extended from the mouth of the River Vardar (River Axios) c.12 miles along the curving coast west of Salonika, to the fishing village of Skala Stavros on the north-west corner of the Gulf of Rendina, c.30 miles to the east of Salonika. The line enabled the city to be transformed into one huge military base with all the logistic provisions that were needed to supply a massive and growing army, and so much wire was used in its construction that by the time it was finished, in late March 1916, it was known to the troops as “the Birdcage”. Despite a certain amount of opposition from the British, the French Army, who were more actively pro-Serbian, took advantage of the new defensive line by beginning a fresh advance northwards from Salonika on 26 March 1916, and on 24 April, thanks to political pressure from the French government, General Mahon heard that his Expeditionary Force could advance as far as but not cross the border separating Greece and Serbia.
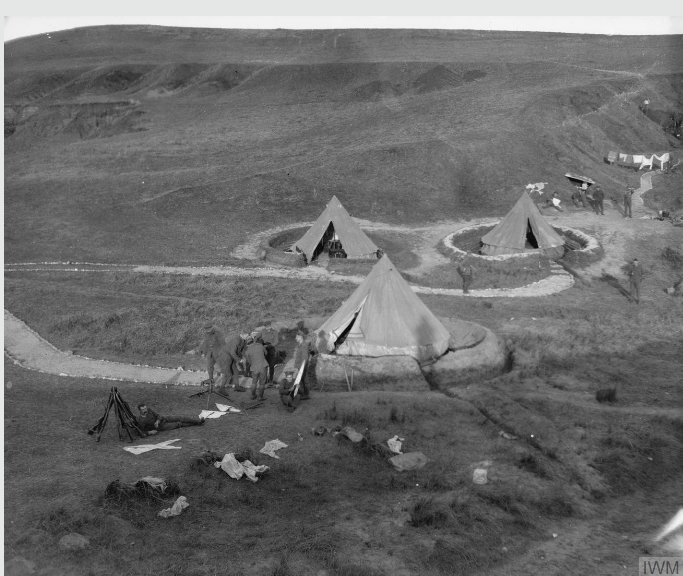
British camp in a valley behind the “Birdcage Line” defences outside Salonika (1916)
(© Imperial War Museum Q31602)
Then in the early summer of 1916, British military perspectives were enlarged somewhat by the arrival of a reconstituted Serbian Army numbering c.140,000 men, by the disembarkation of two Russian infantry Brigades on 1 May, by the arrival in July of the 35th Italian Infantry Division, and by Rumania’s formal declaration of war against Austria-Hungary on 17 August, with an army of c.400,000 men at her disposal. Moreover, Venizelos’s public announcement of his total dissatisfaction with King Constantine’s policy of pro-German neutrality on 16 August 1916 not only worsened the political rift within the Greek population, but triggered a coup d’état on 30 August 1916 by Venizelist officers in Salonika. This enabled Venizelos to leave Athens with 20,000 Greek troops and move to Salonika, where he arrived on 9 October 1916 and set up a rival (Provisional Revolutionary) Government. So by about late July 1916, British troops, who had been allotted their own sector back in mid/late May 1916 at the request of their new Commander-in-Chief, Lieutenant-General (later Field-Marshal) Sir George Milne (1866–1948; later the 1st Baron Milne), were establishing a new front line in the valley of the River Struma (Strymó), which rises in the neighbourhood of Sofia, flows southwards for c.260 miles, and meets the Aegean Sea about 50 miles north-east of Salonika and c.30 miles south-west of the Greek city of Kávala. However, on around 11 and 17 August two Bulgarian Armies – the First Army on the right flank and the Second Army on the left flank – invaded northern Greece in a grand pincer movement against the Armées alliées en Orient – so that, once again, British troops were involved in the aggressive defence of such key objectives as Horseshoe Hill (20 August) – nominally as a gesture of assistance to the five French Divisions in order to keep the War Office happy.
After the First Bulgarian Army was halted on 22 August and both the Bulgarian Armies had been ordered to dig in on 27 August, the fighting died down along the front, giving General Sarrail the time that he needed to change his strategy on the grounds that although the valley of the River Vardar was the most obvious route northwards, it was too heavily defended. Consequently, he made the recapture of the ancient town of Monastir (now Bitola), taken by the Bulgarians on 21 November 1915, his most central and immediate objective on the grounds that this Serbian town in the south-west corner of Macedonia had been an important east–west and north–south crossroads for many centuries. Sarrail’s campaign began on 12 September 1916 and proved very costly, causing both sides a final joint total of c.50,000 battle casualties. At first it achieved very little, mainly because the Bulgarian positions were well prepared and well defended, and Monastir did not fall until 19 November 1916 and proved to be the limit of the French advance northwards. But by this time winter had set in, making further fighting impossible in so harsh and inhospitable a terrain, and on 11 December Marshal Joseph Joffre (1852–1931) ordered Sarrail to call off the offensive.
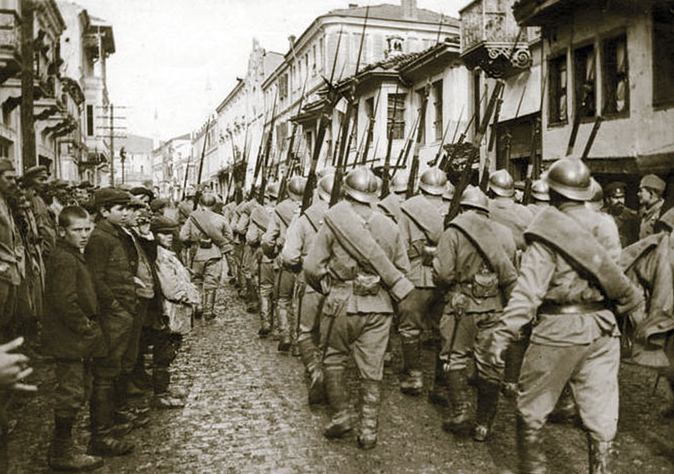
French soldiers entering Monastir (Bitola) (19 November 1916).
The British role in this campaign was largely auxiliary: they were to render assistance to the French by pinning down as many enemy units as possible in the Struma Valley and around Doiran and so prevent them becoming involved in the Schwerpunkt of the fighting further west. But although Venizelos had, after his arrival in Salonika, promised to raise a Greek Army on behalf of the Allies, General Sarrail became concerned that the Royalist Greek Army, which had not been demobilized by King Constantine as expeditiously as he had promised, would attempt to attack the Allied armies from behind – which brings us back to Helme’s Battalion that is now en route from Marseilles via Malta (22 November) to Salonika (30 November 1916).
* * * * * * * * * * * *
After the 179th and 180th Brigades had disembarked at Salonika on 1 December 1916, the men tried, for ten days, to acclimatize themselves to the violent storms and bitter cold of a Greek winter on the bleak camping grounds at nearby Dudulár and Uchanta respectively, where they were issued with the totally inadequate protection against the weather known as “bivvies” – bivouacs, i.e. sheets of thin canvas, about a yard square, plus a small pole. But then, during the night of 10/11 December 1916, the four infantry Battalions of 179th Brigade marched to the English Quay in Salonika harbour where ships of the Royal Navy took them on board and ferried them, including the 38 officers and c.900 ORs of Helme’s 2/16th Battalion, to the fishing village of Vromeri (Scala Vromeris), on the far side of the Themaic Gulf, c.25 miles south-west of Salonika. Vromeri was some three miles east of the town of Katerini, c.16 miles to the north-east of Mount Olympus, and as French troops had already arrived there and were occupying the barracks, the largest building in the town, the men of 179th Brigade had to sleep in the open, with the 2/16th Battalion ranged along the railway to the south of the town. Other units of the 179th Brigade arrived on 15 December 1916 after a difficult five-day march across country. Katerini was important because it was served by the coastal railway line from Athens – which passed through some nearby narrows and had been badly damaged by recent storms. So the 179th Brigade was tasked with preventing Greek Royalist troops – who were reported to be assembling near Larissa, c.46 miles south-south-west of Katerini, from making use of the rail link and the unmetalled coastal road that would take them to Salonika. Consequently, the men of the Brigade constructed a defensive line to the south and west of Katerini and set up outposts that had a clear view across the open plain towards Larissa. The troops also treated the local people with consideration, and used their time in Katerini not only for training, but also to improve the roads and bridges, so that by the time they left between 8 and 10 March 1917, they were on much better terms with the local population than they had been three months previously.
On 11 March 1917, General Sarrail reopened the campaign in northern Greece that had stalled in November/December 1916 by launching an attack on the positions in the mountain ranges that surrounded Monastir on three sides and from which the Bulgarians had been able to shell the town ever since it had been taken back from them on 19 November. The attack began with a three-day bombardment of the Bulgarian artillery positions, and then, on 14 March, the French 76th Division attacked and captured one of the most important of these, on Hill 1248 – which provoked a counter-attack by the Bulgarians. After heavy fighting, the summit of Hill 1248 was abandoned by both sides and Monastir continued to be shelled until the Armistice of 1918, causing many civilian casualties. The 179th Brigade had clearly been forewarned of this development and informed that it was needed in the front line, so it was divided into two columns, the second of which included the Brigade’s infantry Battalions, and this second column set off on 8 March 1917 to march nearly 100 miles northwards with full packs weighing 95 pounds at the rate of about 12 miles a day.
At first the troops had the benefit of three days of good weather and proceeded northwards via Uranovan (12 March), Gida (13 March), Topsin, where it crossed the River Vardar (River Axion) on 14 March, and thence to Amatovo (15 March), where it could be observed from enemy balloons. But here the weather worsened significantly, making it more difficult to proceed under cover of darkness along an unmade, boulder-strewn track to Karasouli (16 March; now Polykastro, c.46 miles north of Salonika, where the largest World War One graveyard in northern Greece is now located, with 1,421 graves). The last part of the long and exhausting march from Katerini to the Macedonian Front was completed in a thick snowstorm driven by an icy wind, and the wretchedly tired British troops finally reached the mountain village of Kalinova – near the front line, and about halfway between Lake Doiran in the north and Lake Ardzan in the south – on 17–18 March. Once it had joined up with the rest of the 60th Division, the 179th Brigade reached the front line during the night of 18/19 March 1917.
The 60th Division was relieving the 22nd Division here by taking over the sector that ran eastwards for about nine to ten miles from the River Vardar over broken, hilly country towards the south-western spurs of the mountainous Pip ridges near Lake Doiran. The 179th Brigade replaced the 67th Brigade at the right-hand (eastern) end of that sector, while on the right-hand (eastern) flank of the 60th Division, the 22nd and 26th Divisions were concentrated into the four-to-five-mile stretch that ended at Lake Doiran. During the relief, the 60th Division was heavily shelled on several occasions, and the War Diary of the 2/16th Battalion records that at 16.00 hours on 18 March two of its officers were wounded by the shelling, one of whom is later identified as T.H. Helme, the first mention of his name in the Diary so far. But neither the War Diary nor his personal file has any record of him being hospitalized on this occasion – an indication that his wound was not severe. In front of – i.e. to the north of – the 60th Division’s positions, no-man’s-land was formed by a plain, about one-and-a-half miles wide, that was intersected by nullahs and dotted with small hills. The Bulgarian positions, consisting of a series of fortified posts, were in the foothills that fringed the northern side of the intervening plain and therefore slightly higher up than those of their British opponents, giving them an advantage as regards artillery. Although General Sarrail had originally wanted his spring offensive to begin in the first week of April, it was postponed until 24 April, and very little occurred in the interim apart from the occasional artillery bombardment and two small raids by the Bulgarians, both on sectors of the front that were occupied by the 179th Brigade. The first of the raids involved between 60 and 100 Bulgarians and occurred in the small hours of 1 April opposite the feature known as “Bowl’s Barrow”. But the raiders were quickly pushed back from the parapet of the British trenches and then, after a short bout of hand-to-hand fighting, dispersed by a patrol of the 2/16th Battalion – which suffered three ORs killed and nine wounded. The second raid was dealt with even more expeditiously by the 2/14th Battalion (London Scottish).
Sarrail’s “major attack”, in which the 179th Brigade acted as the Reserve, was, in the end, a much smaller-scale event than had originally been planned. It began with a four-day-long bombardment of the enemy positions (20–23 April 1917), and during the night of 24/25 April it turned into a diversionary raid on a Bulgarian strong-point known as “The Nose” by c.350 men from the 2/20th (Blackheath and Woolwich) Battalion of the London Regiment, part of 180th Brigade. Their task was to divert the Bulgars’ attention away from the main attack – by the neighbouring 22nd and 26th Divisions – which enjoyed a limited success when British troops captured the two most southerly peaks of “Pip” Ridge in preparation for the major assault on 8 May. After that, nothing much occurred on the Doiran Front for a fortnight. The War Diary of Helme’s Battalion has very little to say about the events of May 1917, except that the Battalion was involved in training, but P.H. Dalbiac (see Bibliography below) tells us that during the night of 8/9 May, elements of the 179th Brigade, including two Companies of Helme’s Battalion, attacked and took five hills “of moderate elevation” near the Bulgars’ front line with almost no difficulty: “Bastion Hill”, “Tomato Hill”, “Single Tree Hill”, “The Turtleback” and “Westbury Hill”, and that during the night of 9/10 May Helme’s Battalion captured “Goldie’s Hill”, a long spur with three peaks that was more important than the other hills because it gave the British a commanding view over the plain “to the enemy’s positions at Devedzeli village and Selimli fords”. The Bulgars counter-attacked twice on 10 May – once before dusk, when they wiped out all but one man in an advanced post that was manned by the 2/16th Battalion. But the 2/16th Battalion had dug in well on “Goldies Hill”, drove the enemy back, and were finally relieved by other elements of the 179th Brigade on 11 May. The Brigade made another advance on 15 May 1917, capturing “Basin Hill”, “Piton 4” and “Bastion Hill”, but by then the general Allied advance was starting to lose momentum.
The fighting went on until 21 May, when the 2/16th was relieved by the 2/14th Battalion, but General Sarrail ordered the end of offensive actions on 24 May. Accordingly, the 180th and 181st Brigades were taken out of the front line between 26 and 28 May, followed by the 179th Brigade – which continued to hold on to its old positions – during the night of 5/6 June. The whole Division then marched back to the English Quay at Salonika, where, with the 179th Brigade bringing up the rear, it embarked for Egypt on the HMT Monitor between 14 and 20 June and on 30 June on the HMT Aragon (1905–17; torpedoed by UC-34 with the loss of 610 lives at c.10.55 hours on 30 December 1917 about ten miles outside the port of Alexandria while waiting for permission to land there). The Division arrived at Alexandria between 18 June and 3 July 1917, i.e. well after the two defeats suffered by the Allies during the First and Second Battles of Gaza (26 March 1917 and 17–19 April 1917) (see F.R. Charlesworth, H.F. Yeatman, R.N.M. Bailey, C.B.M. Hodgson, W.H.R. Crick).
HMT Aragon (1905-17).
At Alexandria, the Division entrained for Moascar, the base camp of the Egyptian Expeditionary Force (EEF), near Ismailia on the Suez Canal, and stayed there for two-and-a-half weeks during July, the hottest time of the year. Because of the intense heat, training during the summer was limited to the early morning and evening, with lectures for the officers and non-commissioned officers in the early afternoon, but as the heat lessened, the training sessions were extended during the daytime, with football and hockey as relaxation in the evenings.
But on 27 June 1917, the newly promoted General (later Field-Marshal) Edmund Henry Hynman Allenby (1861–1936) (later 1st Viscount), who had enjoyed considerable success on the Western Front, arrived in Egypt to take command of the EEF. He was known to be a dynamic commander and excellent organizer/administrator, and one of his first acts was to streamline the somewhat fragmented EEF by dividing it into three Corps. XX Corps, commanded by Lieutenant-General (later Field-Marshal) Sir Philip Walhouse Chetwode (1869–1950) (later the 1st Baron Chetwode), consisted of the 53rd (Welsh), 60th and the newly established (March 1917) 74th (Yeomanry) Divisions, plus the 10th (Irish) Division once it had arrived from Macedonia in early September 1917. XXI Corps, commanded by Lieutenant-General Bulfin, consisted of the 52nd (Lowland), the 54th (East Anglian), and the newly established (March 1917) 75th Divisions. And, from 12 August 1917, the Desert Mounted Corps, commanded by the Australian Lieutenant-General Harry Chauvel (1865–1945), consisted of the ANZAC (Australian and New Zealand Army Corps) Mounted Division, the Australian Mounted Division, and the Yeomanry Mounted Division. Bulfin was replaced as the GOC 60th Division by Major-General (later General Sir) John Stuart Mackenzie Shea (1869–1966).
According to the Battalion War Diary, Helme fell ill on 2 July 1917; and the 2/16th Battalion trained at Moascar until 18 July, when the 179th Brigade followed the 180th and 181st Brigades northwards along the Suez Canal to El Ferdan (18 July), El Ballah (19 July) and Kantarah (20 July). Here it entrained in open coal trucks for Deir-el-Belah, a village on the Mediterranean coast around ten miles south of Gaza, where it arrived on 22 July and where, until 30 July, it continued the tough desert training, involving long marches at night and practice attacks, that had begun at Moascar. On 26 July the 60th Division was detailed to take over the front line from the 53rd (Welsh) Division at Abu Sittah, in the Shellal-Gamli section of the line some 20 miles inland, and did so at night between 28 and 30 July. The divisional HQ was at El Sha’uth (El Shaulth), about six miles south-east of El Gamli, and the front line itself was 10–12 miles south-west of the Turkish positions and consisted of a chain of strong points, each intended for a platoon, well wired and 150 yards apart from one another along the dried-up Wadi Ghuzze, with the intervening desert regularly patrolled by units of the Australian Light Horse. On 12 September the 2/16th Battalion was relieved in the front line, and moved back for more training, which, on 18 September, included firing practice at El Ghabi. By 22 September the Battalion was back near the Wadi Ghuzze once more; there was more musketry practice at El Gamli on 1 October; and from 2 to 20 October 1917 Helme’s Battalion camped at El Sha’uth in preparation for the coming battle. At some point during this period, we do not know exactly when, Helme was made a Company commander, retaining the rank of Captain.
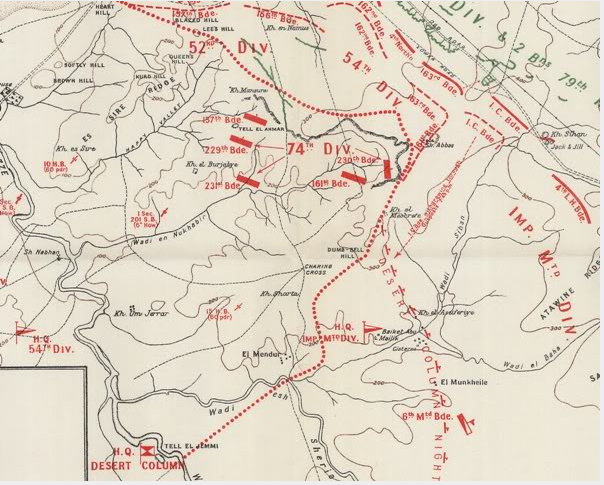
The Northern Sinai Desert to the South-East of Gaza (Autumn 1917), showing the disposition of British and Turkish forces, with the dotted line marking the boundary between them.
General Allenby’s meticulous preparations for taking Gaza were complete by the end of October 1917, and his major aim was to delude the Turkish garrison by means of several ruses into believing that Gaza and the Turkish garrison just to the south-east of that city would be the Schwerpunkt of his assault. Whereas before advancing on Gaza, he really intended to take Beersheba first, 26 miles to the south-east, because of its 17 wells. The carefully planned strategic preparations for the battle began on 20/21 October, which the 179th Brigade spent at Esani, guarding its invaluable water source against a possible surprise attack, and it spent 21 October at an unspecified point on the dried-up bed of the Wadi Ghuzze that was nine-and-a-half miles from the defensive perimeter of Beersheba. Although Dalbiac hardly mentions Helme’s Battalion in his account of the capture of Beersheba and although the Battalion’s War Diary is equally sketchy about the Battalion’s involvement, we know that by the night of 28/29 October the 179th Brigade was at Abu Ghalyun, some ten miles south-west of Beersheba and two miles north-north-west of Khalasa. Moreover, during the night of 30/31 October 1917 the entire 60th Division assembled in brilliant moonlight about three miles south of Beersheba in preparation for the assault, which began at 08.15 hours on 31 October after an hour’s bombardment of Hill 1070, a prominent feature 500 yards north-west of the Turkish front line, which was taken in ten minutes.
Beersheba was then surrounded by the 60th and 74th Divisions and the general advance on the town began at 12.15 hours – which the War Diary of the 2/16th Battalion registers in a cryptic note. The Turkish garrison offered little resistance, and at 13.00 hours the War Diary of Helme’s Battalion observed that the Turks were in full retreat and that “our objective” had been taken. The town fell at 19.40 hours thanks to a spirited charge by Australian units of the Desert Mounted Corps. The whole action cost Helme’s Battalion four ORs killed in action and 31 ORs wounded, and the entire 60th Division had lost three officers and 67 ORs killed in action and 13 officers and 358 ORs wounded – small losses in comparison with those on the Western Front – but only two of Beersheba’s wells had been demolished and no booby-traps had been left around the town. It is, however, probable that Helme did not take part in the capture of Beersheba, since his name does not appear in the War Diary’s Appendix ‘D’ – the list of officer participants. Instead, it is included on the list of six officers from the Battalion who were left “with Reinforcements” during the fighting, which seems to mean that he was one of the “certain proportion of officers, N.C.O.s, and specialist privates” who, Dalbiac tells us, were, on Allenby’s orders, “to be kept back out of action as a first reinforcement” and “consisted for infantry of nine officers and one hundred and seventeen other ranks per battalion [who] were to form a reinforcement camp to provide escorts for convoys etc.” Helme was probably kept back partly because of his relatively advanced age, but mainly because of the administrative skills he had developed during his 18 months as the Battalion’s Adjutant, since an obituarist would later record that he had been “the Battalion Adjt (Captain) in France and Salonika and the Coy CO in Egypt and Palestine” and had done “extremely good work bringing divisional supplies over unknown country at night during the advance on Beersheba and Jerusalem”.
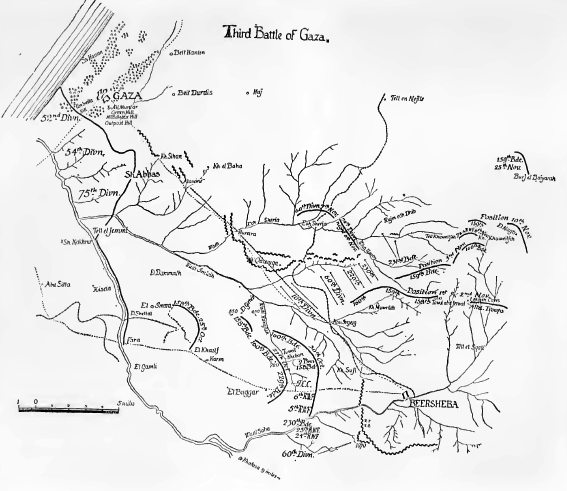
Hand-drawn map of the Third Battle of Gaza (31 October-7 November 1917).
Unlike the lead-up to the first two Battles of Gaza, Allenby’s preparations for the Third Battle were detailed and thorough – with, for example, all-important dumps of water secretly provided in advance – and the battle itself constituted a three-part rolling set of actions and manoeuvres. The first part is also known as the Battle of Tel-el-Khuweilfeh (1–6 November 1917), a small town in the southern Judean Hills, c.13 miles north-east of Beersheba, which, like Beersheba, possessed significant water supplies. The second part was the most important part of the battle, because, if successful, it would allow Allenby’s army to advance into northern Philistia and thence into Judea. It involved the well-prepared Turkish defensive line that curved downwards and westwards from Tel-el-Khuweilfeh, then westwards through the village of Tel-esh-Sheria, where there were more important wells and where the north–south railway line crossed the Wadi el Sheria, then passed through nearby Abu Hureira on the maritime plane, and finally rose north-westwards to Gaza on the coast. And the third part involved a phased attack on Gaza City itself by the three Infantry Divisions of Bulfin’s XXI Corps (see above). The fighting would begin as a diversionary assault and continue as such until the outcomes of the attacks on Beersheba, Tel-el-Khuweilfeh and Tel-esh-Sheria were clearly known.
So after two-and-a-half weeks of preparatory bombardment by 68 pieces of heavy artillery supplemented by the armament of one cruiser and four monitors off-shore, the centrality of the attack on Gaza gradually increased, especially after the fall of Beersheba on 30 October. The Allied attack began with a preliminary assault on Umbrella Hill at 23.00 hours on 1 November, with their main attack following at 03.00 hours on 2 November. This was, however, so successful that by 06.15 hours almost all the main objectives had been taken and the way was open to the village of Sheikh Hassan on the coast, just to the north of the northern suburbs of Gaza City. But the fighting around Gaza was so fierce that it continued for another four days, causing the Turks, as Allenby and Chetwode had hoped, to send their reserves away from the city and relieve the pressure that was increasing on their forces further over to the east. So by midnight on 6/7 November the three Divisions of the Ottoman XXII Corps that constituted the Turkish garrison of Gaza City, commanded by the extremely competent Mirliva (Major-General) Refet Bey (1877–1963), were finally compelled to withdraw northwards in good order from the city’s gutted and deserted ruins, destroying roads, bridges and water-lifting plant as they went. And when, at 23.30 hours on 6 November, Bulfin’s XXI Corps attacked “Outpost Hill” and “Middlesex Hill” on the eastern and south-eastern sides of Gaza City, they encountered no opposition and were able to occupy them in the small hours of 7 November. Consequently, the road that led to Jerusalem was all but open, despite the Turks’ plan to establish a defensive position along the Wadi el Hesi, about seven miles north of Gaza City and seven miles south of Ashkelon (Askelon), which they had already partially fortified and where there was heavy fighting on the afternoon of 8 November which ended with the capture of “Sausage Ridge” by elements of the 52nd Division (see Crick).
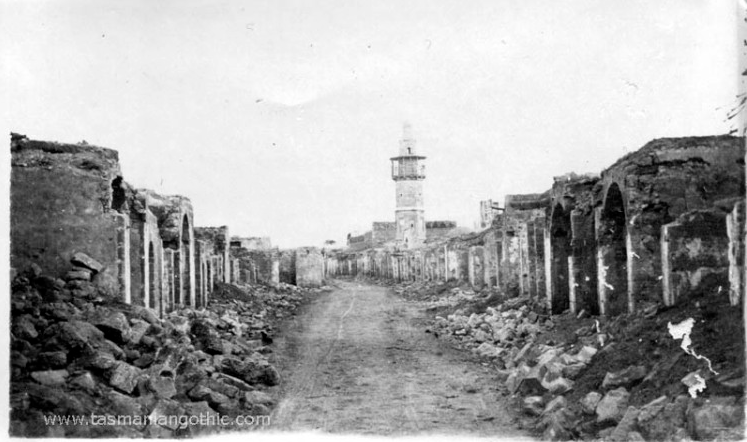
Gaza after its capture by the Allies. The Mosque at the end of the street is probably the one just below the skyline in the top centre of the photo below (November 1917).
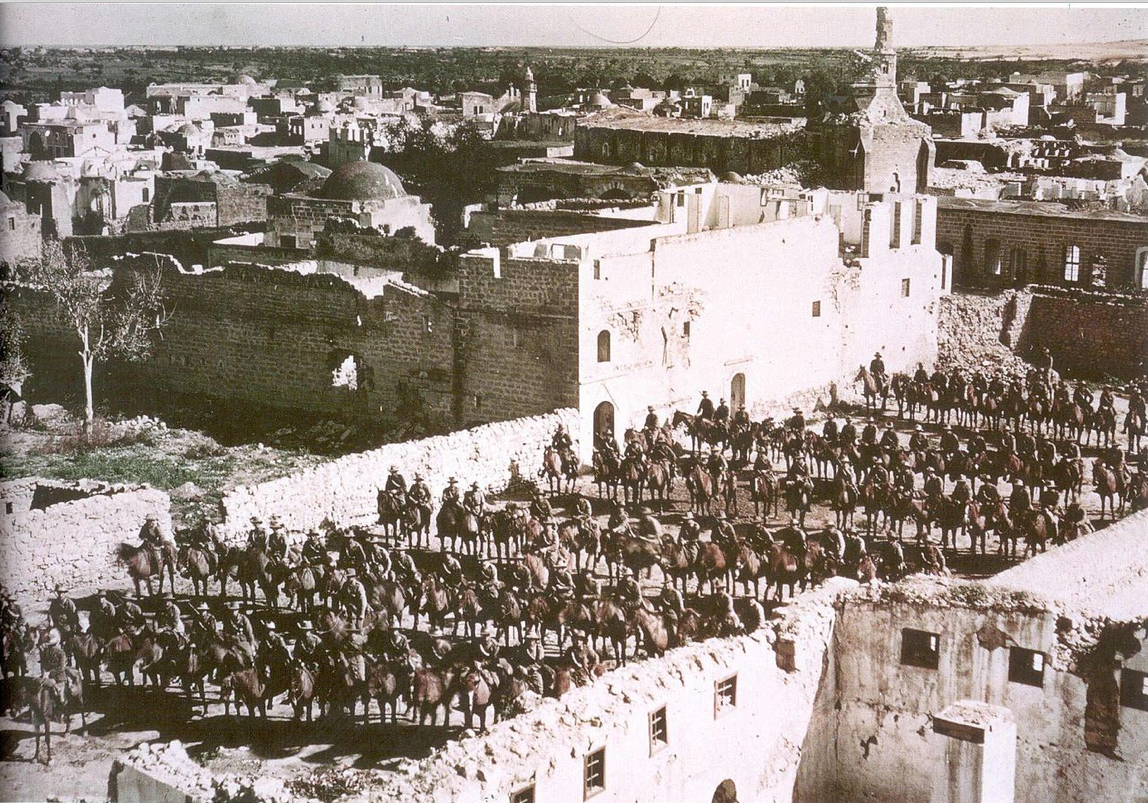
Gaza after its capture by the Allies. The ruined Great Mosque can be seen in the right centre of the photo (1917/18).
Meanwhile, during the final part of the fighting for Gaza, Allied units had been making their way north-westwards from the Beersheba area along the road to Gaza in order to threaten the extremely strong Turkish defensive line that straddled the road. It extended from the Jerusalem–Beersheba railway line in the west, through the large Redoubt at Abu Hureira just to the west of the main road (the Kauwukah system) to the eastern end of Wadi Sheria in the east (the Rushdi system). On 3 November Helme’s Battalion marched through Beersheba and bivouacked for the night two miles to the north-west. But because of water and transport problems, the advancing Allied troops were able to halt and rest on 4 and 5 November in preparation for the crucial attack on the Turkish defensive line during the night of 5/6 November.
So when, at c.10.00 hours on 6 November 1917, three of the four Divisions comprising XX Corps attacked the Kauwukah system, the 53rd Division and a Yeomanry Brigade pre-empted an outflanking move by attacking the Turkish positions at Tel-el-Khuweilfeh, over to the east-north-east of the main road to Gaza in the Judean foothills. In the west, the 74th Division had reached the Jerusalem–Gaza railway by 12.15 hours; in the centre, the 60th Division, with the 180th Brigade in Reserve and the 179th and 181st Brigades on the left and right of the attack respectively, and the 2/16th Battalion on the right of 179th Brigade’s front line, soon carried their objective despite heavy shell fire, thus allowing other units to pass through them and carry all their objectives by 13.30 hours. By 14.00 hours the entire Kauwukah system was in Allied hands, followed rapidly by the Rushdi system, and by the evening of 7 November the entire Turkish defensive line had been captured despite strong Turkish resistance and the shortage of water. The 2/16th Battalion had taken 40 prisoners, and its War Diary remarked, with unusual expressiveness: “The enemy fled before our bayonets”.
Over the next 36 hours, Helme’s Battalion acted as part of 60th Division’s vanguard in the ensuing drive through open country to push back the Turkish rearguard even further, and this success enabled Allied troops to advance nearly as far north as the town of Huj itself, seven miles east of Gaza City. On 8 November, with the 179th Brigade in the vanguard once more, the Allied Force set off at 07.00 hours and by 09.30 hours the 179th Brigade had taken the Zuheilikah Ridge and was moving to attack the village of Muntaret-el-Baghl, where the Turks were well dug in and commanded a clear field of fire down a long, bare, gentle slope. Despite heavy shelling, the 2/15th and 2/14th Battalions of the 179th Brigade managed, respectively, to assault the Turkish positions head-on and get round their left flank, forcing the Turkish defenders to withdraw northwards and leaving Huj wide open to a daring cavalry charge on the remaining 12 Austro-German and Turkish gun positions by three Squadrons of the 1/1st Warwickshire and 1/1st Worcestershire Yeomanry Regiments. According to Dalbiac, the cavalrymen charged “with magnificent dash right up to the guns in the face of point-blank gunfire, machine-gun, and rapid rifle fire, sabring the gunners and capturing every gun”, and then, “continuing the charge, they took four machine guns, which they turned on the retreating Turks with great effect”. But although it was then possible for the Allies to capture the town itself and much useful matériel, the charge alone had cost the two cavalry regiments nine officers (including all three Squadron Commanders) and 96 ORs killed, wounded or missing; the two days’ fighting had cost Helme’s Battalion one officer and 27 ORs killed, 16 officers and 258 ORs wounded, and two missing, and the entire 60th Division 45 officers and 873 ORs killed, wounded or missing.
Allenby had hoped that the initial success of his carefully thought-out strategy would enable his army to annihilate the Turkish garrison of Gaza as it moved northwards through Philistia, but this turned out to be too optimistic, not least because of the number of prisoners that the Allies were capturing daily and the difficulties that were involved in obtaining and transporting sufficient supplies of water. So while General Bulfin’s XXI Corps was able to pursue the retreating Turks up the road that ran through the fertile coastal plain, and units of the Desert Mounted Division, including Yeatman’s 6th Mounted Brigade and Bailey’s 22nd Mounted Brigade, were able to zig-zag northwards fairly rapidly across the Plain of Philistia, General Chetwode’s XX Corps had come to a standstill at Huj, and on 11 November 1917 was moved back to the recently completed railhead at Karm, some ten miles north-west of Beersheba, where it could be supplied without great difficulty. On the same day, Helme’s Battalion moved with the rest of the 179th Brigade to Wadi Jemmameh in the Negev Desert c.20 miles west of Beersheba, where there was also water.
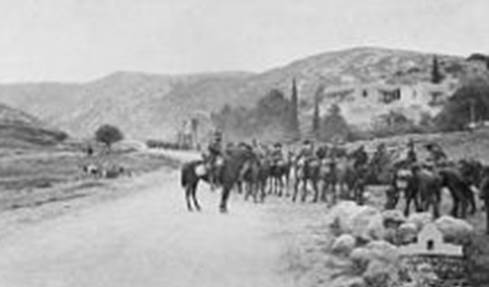
Once again, the War Diary of the 2/16th Battalion paints a very sketchy picture of the Battalion’s movements and actions, but we do know that on 16 November the 60th Division received orders to move northwards and strike at the key railway station at the Wadi es Dara. It was known as Junction Station because it was here that the main, narrow-gauge Turkish line down to Gaza and across to Beersheba branched off eastwards in order to link the coast with Jersualem. Accordingly, on the same day, the whole Division, including Helme’s 2/16th Battalion, moved across to Wadi Sheria where it finally received post. Then, on 19 November, the Division marched through Gaza itself and camped one-and-a-half miles outside the town; by 20 November the autumn rains had begun and the Division marched to Medjel, much further north; by the evening of 21 November it had reached the outskirts of El Kustineh (Qastina), c.30 miles north of Gaza; and finally, on 22 November, the Division reached its appointed goal, the mountain village of Kuryet-el-‘Enab (Kuryat-el-Enab, Qaryat-al-Inab, Kirjath, Kir-jath-jearim, the modern Israeli settlement of Abu Ghosh), where the men were awarded almost two weeks’ rest in a pleasant environment.
However, the necessary delay and the circuitous route meant that the Division did not take part in bringing to a halt the anticipated Turkish counter-attack that took place on 12 November, when four Ottoman Divisions advanced against the scattered Brigades of the Australian Mounted Division that were protecting the right of the Allies’ line. By launching this offensive, the Turks were attempting to outflank the Australian Brigades and attack Allenby’s army from the south-east while it was positioning itself to take Junction Station. At first the Australians were forced to pull back southwards from Tel-el-Safi in the north through Balin and Barquaya in the east, but the Allied withdrawal was carefully conducted at the cost of relatively few casualties, and by 18.00 hours the Turkish attack had petered out before the village of Summil. And on the morning of 14 November 1917, Junction Station was taken by a Brigade of the 75th Division plus some armoured cars – eight days before the arrival of 60th Division which was, on the following day (23 November), moved further eastwards to Latron, an important half-way point on the Jaffa to Jerusalem road. On 24 November the Division moved to Kuryet-el-‘Enab about seven miles west of Jerusalem and just to the south of the Jaffa–Jerusalem road – where it was treated well by “most hospitable French monks who assisted in every way” and who put their chapel at the Division’s disposal for use as a relay hospital. In doing so, the 60th Division had left the desert for the hilly landscape of central Judea, which rises to a height of c.3,000 feet. According to Dalbiac, who was of the opinion that it would hard to imagine a less suitable terrain for fighting over, it was:
everywhere broken by deep valleys, and rocky ravines lined with deep shingly beds, washed down by the mountain torrents, from which the hill slopes rise in steep gradients, often made steeper by terraces built up for purposes of cultivation.
By now the British front line extended eastwards from the mouth of the Wadi Auja on the Mediterranean coast of Palestine to Beit el Foka (Beit Ur al-Fauqa), around nine miles east of Ramallah, then southwards across the Jaffa–Jerusalem road near the village of Lifta, a northern suburb of Jerusalem, then around to the east of the Jerusalem plateau and from there to the hilly terrain north of Bethlehem, about three miles south of the Holy City. Meanwhile, other elements of XXI Corps had been trying to struggle eastwards across those bleak hills in worsening weather conditions and over barely existing tracks in the hope of reaching and capturing the town of Bireh (el-Birah, al-Birah, el-Birah, Bire), about nine miles north of Jerusalem, one of the administrative and political centres of the Ottoman Empire in Palestine which sits astride the road leading northwards from Jerusalem to Nablus (Shechem), the HQ of the 7th Ottoman Army. The idea was that once the Allies had reached Bireh, they would be able to block one of the Turks’ main lines of communication so that Allied reinforcements could approach Jerusalem relatively easily along the main road to the west of the city – one of the better roads leading to Jerusalem. But on 21 November, the 234th Brigade, part of the 75th Division, encountered the large force of Turks that was defending nearby Neby (Nebi) Samwil, a heavily fortified hill-top village on the western end of a ridge that runs for nearly a mile north-west to south-east and rises to a height just below 3,000 feet. It was also central to the Turkish defence of Jerusalem, being four-and-a-half miles north-west of the city and a vantage point from which an observer with good field glasses or a reasonably powerful telescope could look south-eastwards into it. As a result, a pitched battle began immediately and continued on 22 November.
By this time, Allenby, who was anything but a complacent General, realized that the price which his army had paid for its early success and its increasingly embattled situation as it neared Jerusalem called for a major logistical decision on his part if the Turks were to be prevented from making the best use of their strong, well-prepared defensive positions and deploying their new, German-trained shock troops for a major counter-attack which could deprive the Allies of their recent gains. So on 25 November 1917 he ordered a sudden but well-planned change-over of troops, whereby the seriously depleted and battle-weary Divisions of XXI Corps that were operating in the eastern end of the Allied front line – notably the 52nd (Lowland) Division, the 75th Division, and the Desert Mounted Corps – would change places with the relatively underused Divisions of XX Corps – notably the 10th (Irish), the 60th (2/2nd London) and the 74th (Yeomanry) – that had not been involved so heavily either in the recent fighting further south or in the inhospitable mountains of Judea. The change-over was to take place as soon as possible, which explains why, to take one example only, the battered 234th Brigade was withdrawn from Neby Samwil on the morning of 25 November to Kuryet el ‘Enab, c.12 miles westwards along the road to Jaffa, and why, at 05.45 hours on 26 November, it continued to march a further 17 miles westwards to Junction Station via Latron, where it arrived at 15.00 hours.
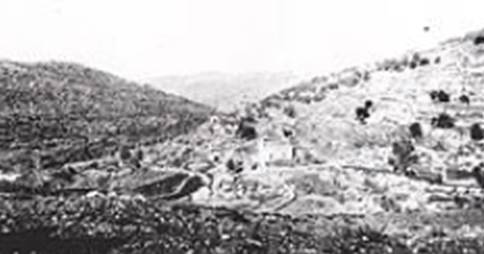
Typical Judaean Hills landscape (1917).
Units of the Australian 4th Light Horse Regt entering mountain passes on the Tel-Aviv-Jerusalem road near Latron.
The 234th Brigade continued its withdrawal on the following day, this time to Beshshit, just over ten miles away to the west, and stayed there until 1 December, when it moved to Yebnah (Yibna’, Jabneel, Javne), roughly four miles to the north-east, and ten miles south-west of Ramleh. In return, the 60th Division took over in the front line on the Neby Samwil Ridge on 25 November, initially for two days. The second day on the Ridge seems to have been relatively quiet, but at 02.30 hours on 27 November the Turks advanced southwards down the surrounding hillsides and attacked the extreme left of the 179th Brigade’s sector of the line, which was held by Helme’s 2/16th Battalion. The attack was driven off by a bayonet charge before it could develop. Between 13.00 and c.17.00 hours on the same day, however, the Turks bombarded the Hill with high explosive and gas shells before launching a determined attack that caused 79 casualties and came to an end at about 19.00 hours. Once again, the War Diary contents itself with the laconic remark: “Fighting with Turks in defensive positions blocking the road to Jerusalem”. Nevertheless, the desperate fighting for control of Neby Samwil and its ridge continued until 29 November, when one final attack left more than 500 dead Turks on the slopes of the hill, after which, as Dalbiac put it, they “had no inclination to renew the attack, and we [i.e. the 60th Division] were left in peaceful possession of the ridge”.
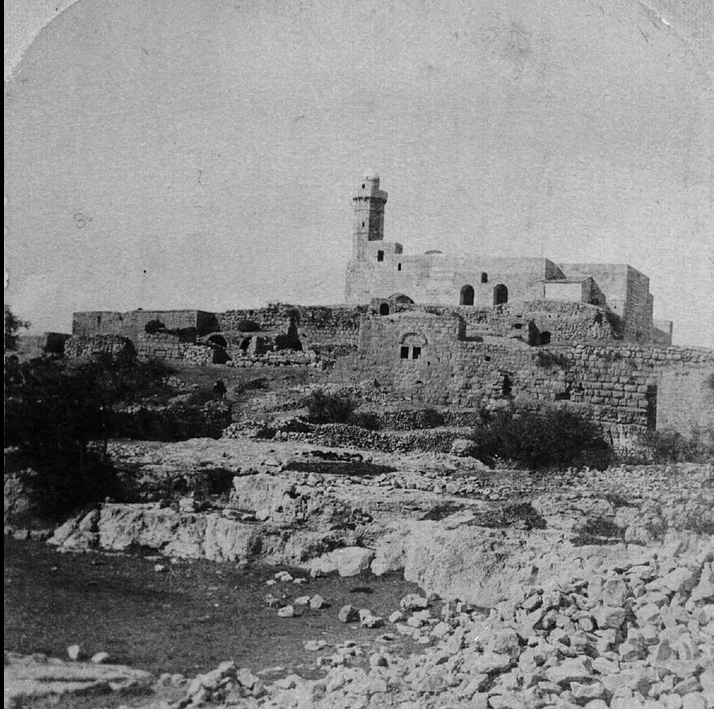
The fortified village of Neby Samwil, c. five miles north-west of Jerusalem (1918).
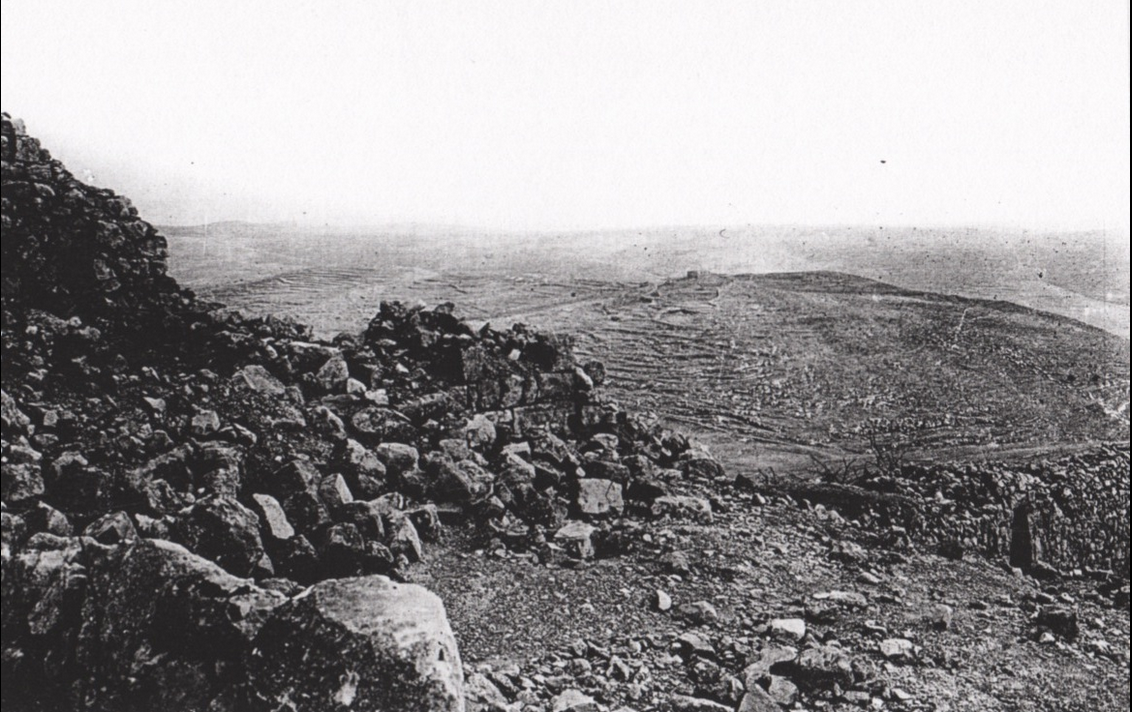
The view south-east from the summit of Neby Samwil, taken after the Battle (17-24 November 1917). Jerusalem is just visible on the flat-topped hill in the centre of the background.
But although the Allies had won the Battle of Neby Samwil, the events of the preceding week had shown Allenby and his staff the unfeasibility of getting to Bireh by way of the northern Judean mountains, and so, at a Corps conference in Yalo, a mountain village c.13 miles west-north-west of Jerusalem, it was decided to attack the Turkish positions covering Jerusalem from the west and the south-west, rather than the north-west. Allenby also realized that in order to take Jerusalem, he needed to have the Jaffa–Jerusalem road made more negotiable and to have new roads constructed between Latron and Beit Likia and between Kuryet-el-‘Enab and el Kubeibeh in order to make the Judean mountains to the north of the Jaffa–Jerusalem road less inaccessible. So while British Pioneer Battalions and men of the Egyptian Labour Corps toiled away at these tasks, from 1 to 5 December the 2/16th Battalion was on outpost duty at Küstül (Kustal), a village on a hillside just south of the Jaffa–Jerusalem road that rises out of the Wadi Ikbala about five miles west of Jerusalem and that was, after Neby Samwil, the most prominent natural feature of that area.
Preparations for the final attack on Jerusalem began on 4 December; Allenby decided that the 60th Division should spearhead it; and on 7 December the 179th Brigade concentrated at Soba (Suba, Sobetha, Zuva), about six miles due west of Jerusalem and a mile or so to the south of the Jaffa–Jerusalem road. So on 8 December 1917, in a biting wind and heavy rain that turned the unmetalled roads into mud, deprived the infantry of artillery support, and slowed down the Allied encirclement of Jerusalem, the 60th Division moved towards Jerusalem over unfriendly territory. It had the 179th Brigade on the right, occupying the space between Tumulus Hill and Khurbet es Suhr, the 180th Brigade on its immediate left with its left flank on the Jaffa–Jerusalem road, and the 181st Brigade in Reserve. Although Turkish resistance was much stiffer and more determined than had been expected, all the Turkish positions around Jerusalem were subdued by the end of 8 December. Helme’s 2/16th Battalion took part in this fighting by participating in the capture of the ancient village of Ain Karim, a mile or so to the south-east of Küstül and according to tradition the birthplace of St John the Baptist, and by storming the hilltop defences of nearby Deir Yesin (Deir Yassin, Dayr Yāsīn), around three miles from Jerusalem. These two actions cost it two officers and 19 ORs killed in action and two officers and 62 ORs wounded. Then, after spending the night of 8/9 November on the high ground east of Khurbet es Suhr, early on 9 November the 60th Division marched to Jerusalem, and on the same day the 179th Brigade took up a defensive position to the north of the Holy City athwart the Jerusalem–Nablus road. The capture of Jerusalem on 9 December by a handful of Allied troops allowed the Mayor of Jerusalem to hand over the City to General Shea just before midday. General Allenby was able to march in through the Jaffa Gate at the head of his men on 11 December to a rapturous reception by the local population and to formally accept Jerusalem’s surrender from its civic leaders, thus ending four centuries of Turkish rule. Despite the apparent ease with which the Allies had conducted the final phase of the operations, the cost to the Turks had been very great, having suffered 25,000 casualties between 31 November and 9 December 1917. Having realized that the constellation of Allied forces in the area had become significantly stronger, the Turks gradually ceased their habitual policy of immediate counter-attacks.
By 10 December 1917 Allenby had succeeded in creating a front line that extended for c.40 miles from Jaffa on the Mediterranean coast to Jerusalem in the east and encircled that City at a distance of around three miles from the centre. But as he realized that this base was not broad enough either to secure it from a concerted attack or to allow him to advance eastwards across the River Jordan and then northwards towards Baghdad, he decided to make Jerusalem militarily safer by moving the entire front line outwards by six to eight miles and by improving the condition of roads and communications. Despite some significant attacks by the Turks between 11 and 24 December, Allenby began to implement his plans using local labour, while Helme’s Battalion spent from 11 to 15 December in Reserve at Sha’fat (Shu’fat, Shuafat; the Biblical City of Nod) in north-eastern Jerusalem on the old road to Ramallah, and from 16 to 24 December in billets in Jerusalem itself.
On 24 December, however, an intelligence report indicated that the Turks intended to mount a counter-attack southwards from Nablus on Christmas Day, and this information triggered two/three days of fierce fighting, in more bitterly cold and wet weather, from the night of 26/27 December to 29 December 1917. Allenby successfully used this fighting to initiate his broader strategy, and so, during the night of 24/25 December, the 179th Brigade moved from Sha’fat to nearby Tel-el-Ful, “a conical hill, covered with large boulders and loose stones” which was just west of the modern Israeli suburb of Pisget Ze’ev and “possibly the most important point in the whole [defensive] line” because it commanded a long stretch of the north–south main road. Helme’s 2/16th Battalion was on the right (east) of the line here, with the 2/13th Battalion (Kensingtons) on its left (west) flank, the 2/15th Battalion (Prince of Wales’s Own Civil Service Rifles) to their rear in support, and the 2/14th Battalion (London Scottish) in Reserve. Nothing materialized on Christmas Day, but the Turks began their assault on the hill at 23.30 hours on 26 December, and made another eight attacks on the hill, supported by artillery, between 01.30 and 08.00 hours on 27 December. They were finally driven back at bayonet point in a savage action which cost the 2/15th Battalion nearly half of its strength. According to an obituary, on 27 December Helme and a group of men were on outpost duty on the nearby heights of Ras-el-Tawil (Ras-el-Tawel), a neighbouring high point about four miles north of the centre of Jerusalem. When they were rapidly dislodged by a major Turkish attack, they had to leave all their personal effects behind when they withdrew to the main line, and although the 2/16th Battalion succeeded in retaking the hill at dawn on 28 December, suffering heavy casualties as it did so, it was not possible to find any of the missing kit.
As usual, the War Diary of the 2/16th Battalion has nothing to say about the retaking of Ras-el-Tawil and the subsequent Turkish withdrawal northwards, but it seems that the other two Brigades in the 60th Division – the 180th and the 181st – spear-headed the advance with the 179th Brigade concentrated behind the former. Whatever part Helme’s Brigade then played, the 180th Brigade captured the line between the villages of Er Ram and Rafat, some eight miles north of Jerusalem and three miles south of Ramallah, by 19.15 hours on 28 December and the two villages of Nebala (Bir Nabala) and El Jeeb, just to the south-east, by 00.30 hours on 29 December. When the Allied advance northwards continued on 29 December, 2/16th Battalion reached the village of Kulundia (Kolundia, Qalandiya), around seven miles north of Jerusalem, and then Rafat, a mile to the north-west, while the 180th and 181st Brigades continued their increasingly slow advance, through extremely difficult country that consisted of “a succession of steep, rocky hills, intersected by wadis with almost precipitous sides”. But by 23.00 hours on 29 December, these two British Brigades had successfully reached their final objective – a line running through Beitunia and just to the south of Ramallah – and had, in the process, split the Turkish Army into two halves, one of which was withdrawing northwards to Nablus while the other had moved eastwards into the wilderness of Judea.
Once this part of the campaign was concluded, the 53rd and 60th Divisions changed locations, allowing the 60th Division to return to the vicinity of Jerusalem. The War Diary of Helme’s 2/16th Battalion confirms that it returned to billets there from 1 to 5 January 1918 and that Helme was assigned to look after reinforcements. On 6 January 1918 the Battalion marched to the village of Khirbet Deir Ibn Obeid (Al Ubeidya, Al Ubaidah), about six miles east of Jerusalem, in order to reconnoitre the high ground between it and Massada, on the western edge of the Dead Sea. While it was returning to Jersualem during the night of 7/8 January in a gale of wind and rain, Helme’s pack and its contents were lost for the second time, this time from the back of a pack mule. On 9 January Helme’s Battalion relieved the 2/14th Battalion, which moved back onto the Mount of Olives and stayed there until 2 February, when the rainy season was at its worst.

A Market in Jericho.
(Imperial War Museum Q86300)
By this time, Allenby was turning his attention to the next phase of his strategy – the capture of Jericho, c.16 miles east-north-east of Jerusalem and 3,000 feet lower down in the Jordan Valley. So in early February 1918, after the Allied forces at the eastern end of the front line had, like the 2/16th Battalion, spent most of January reorganizing, training, patrolling, improving sanitary facilities, and visiting biblical sites as the occasion offered, they began to prepare for an assault on Jericho which would, at the same time, force the eastern half of the defeated Turkish Army to retire east of the River Jordan. The advance down into the Jordan Valley towards Jericho and the Dead Sea took place during the night of 8/9 March 1918, when elements of Chetwode’s XX Corps that were on the right of the Allied line moved northwards towards Nablus and Tul Karm (Tulkarem), the HQ of the Turkish Eighth Army, midway between Nablus and Jenin and straddling the Jerusalem to Nablus road. Then, after a preliminary skirmish on 14 February, the major part of the action, which involved a difficult advance through “as difficult and forbidding a country as one could well imagine” and became officially known as the Battle of Tell ‘Asur, began during the night of 18/19 February 1918.
At 05.15 hours on 20 February Allied artillery, supported by covering machine-gun fire, preceded an attack on Jebel Ektief, a large hill five miles south-west of Jericho, which ended with its capture at 15.00 hours. 21 February was a relatively quiet day for Helme’s Battalion and the Battle for Jericho ended on the morning of 22 February, when the Turks pulled back from the village of Talat-ed-Dumm – half-way between Jerusalem and Jericho and roughly three miles from Jebel Ektief. This allowed ANZAC Cavalry to clear the town and pursue its defenders to El Ghoraniyeh, 800 feet lower than Jericho and nine miles north of the northern end of the Dead Sea, where the one (wooden) bridge over the lower reaches of the River Jordan was located. On the same day, units of the 60th Division took Ras-el-Tawil, nine miles north of Jerusalem on the Nablus road. The engagement had cost Allenby’s army c.500 of its men killed, wounded or missing, and although the three Brigades of the 60th Division had played a central role in the fighting, losing 421 of its men killed, wounded or missing, it is by no means certain that Helme was actively involved. It seems that he may have been sick by the end of January 1918 since his name does not appear on the list of active officers that was appended to his Battalion’s War Diary on that day, and on 12 February the War Diary for that month (all but illegible due to rain making the indelible ink run – cf. Crick) records that he had been sent to the Field Ambulance – presumably because of illness. On 23 February the 60th Division was withdrawn from Jericho and the 179th Brigade returned to the Mount of Olives as divisional Reserve; on 27 February the Brigade was moved to Ras-el-Tawil, where the men were used to improve the road to Jebel Kuruntul (Quruntul, Quarantania), known in English as the Mount of Temptation, a 1,200-foot-high prominence that towers over the town of Jericho in the north-west. Helme’s 2/16th Battalion stayed in this area until 21 March 1918, using its time there to continue making roads, to train specialists, and to reconnoitre the territory down to the River Jordan, some four miles to the east, in preparation for Allenby’s second push eastwards.
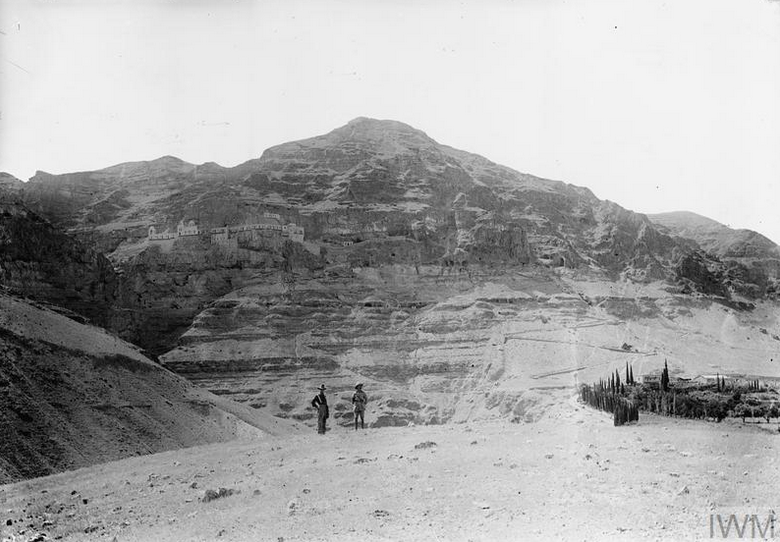
The Mount of the Temptation (Jebel Kuruntul), where, according to the three Synoptic Gospels, Christ was tempted by the Devil. ). IWM Q12699
Now that his troops had been rested and his defensive position around Jerusalem had been adequately secured, Allenby decided that it was time to mount a raid across the River Jordan and into the Moabite hills. Two of the primary objectives would be the destruction of a large supply dump and of a long railway viaduct and tunnel on the north–south Hedjaz railway near Amman. So on the night of 19 March, i.e. just a week after the end of the Battle of Tell ‘Asur and while fighting was still going on near Jericho, a force commanded by Major-General Shea, the General Officer Commanding 60th Division, began to advance towards Amman, the capital of Jordan c.30 miles east-north-east of Jericho. As the River Jordan was still in full flood and therefore unfordable, it was necessary to build three new bridges, rebuild the stone bridge at El Ghoraniyeh that had been destroyed by the retreating Turks a month previously, and construct a new pontoon bridge at Makhadet Hajlah, where the Wadi Kelt (Khelt) meets the River Jordan, just a mile north of the Dead Sea. The crossing of the Jordan was initially fixed for the night of 21/22 March at El Ghoraniyeh, but the attempt by crack Australian bridging engineers to repair the bridge or use rafts instead had to be abandoned because of stiff Turkish opposition and the state of the river at 01.30 hours on 22 March. So their attention was turned to Makhadet Hajlah, three miles to the south, where strong swimmers had effected a crossing and the Australian engineers had managed to construct a bridge of aluminium pontoons. By these means the Auckland Mounted Rifles had begun to cross the River Jordan at 04.00 hours on 23 March 1918 and finished by 08.10 hours on the same day. Once the New Zealand cavalry was across, they turned north, with the weather as bad as ever, and began to secure the ground for the infantry of the 60th Division by clearing out the Turks from the east bank of the River Jordan right up to El Ghoraniyeh.
The 179th Brigade quickly took advantage of the New Zealanders’ initiative and at c.15.00 hours on 24 March elements of the Brigade, including Helme’s 2/16th Battalion, were able to cross the pontoon bridge at Makhadet Hajlah, advance up the east bank of the Jordan, and then turn east at El Ghoraniyeh in order to advance on Amman by road – a 25-mile-long march via the ancient hillside town of Es Salt (As Salt), which involved an ascent of 4,000 feet from the valley of the Jordan and through the Mountains of Moab. The other two Brigades followed the 179th Brigade’s example, but whereas the 181st Brigade advanced rapidly towards Es Salt along the partially metalled road that had been built by the Turks, the 179th Brigade advanced along the rough track that ran along the precipitous Wadi Arsenn’yet which flowed north of and parallel with the metalled road. By 15.00 hours on 24 March the 181st Brigade had captured Rifle Ridge and the mountain village of El Haud (Al Hawd), which was crucial because it was the highest point in the foothills and had a commanding view over the road to Amman. The 181st Brigade then continued the advance, reached the outskirts of Es Salt on 25 March with incessant rain pouring down, and captured it on the following day.
Helme’s Battalion finally arrived at Es Salt in better weather on 26 March, having suffered very few casualties en route, and after going back down the road for a couple of miles to pick up supplies at El Howeij, it stayed at Es Salt until 28 March. By this time four Battalions of the 179th Brigade had set off for Amman, just over 13 miles away by road (see Crick). Although advanced elements of “Shea’s Force” reached the outskirts of Amman on the morning of 28 March, the delay had given the Turks time to prepare their defences well and bring up 15,000 reinforcements, with machine-guns manned by German gunners dominating the potential battlefield. News of the Turkish advances reached Helme’s Battalion in Es Salt on 29 March; while outside Amman, after nearly four days of intermittent Turkish assaults and stubborn hand-to-hand fighting, it had become obvious that the Allies’ prospects of victory were extremely poor without the necessary artillery. Consequently, “Shea’s Force” was compelled to withdraw westwards during the night of 30/31 March, in almost incessant rain and intense cold, and along roads that had turned to mud.
After blowing up the Turkish ammunition dumps at Es Salt, the 2/16th Battalion left on the evening of 1 April and marched back without incident along the Wadi Arsenn’yat for 16 miles to a point just west of the village of Shunet Nimrin before, like the rest of “Shea’s Force”, recrossing the Jordan during the afternoon of 2 April 1918. Although General Shea left garrisons to defend the new bridges at El Ghoraniyeh and Makhadet Hajlah, his raiding force had not fulfilled two major tasks – the destruction of the large railway viaduct and tunnel near Amman, which the Turks had defended tenaciously with c.4,000 men and 15 artillery pieces. To have achieved this objective would have seriously damaged the functioning of the Hedjaz–Damascus railway, deprived the Turkish Army further south of essential supplies, and encouraged Colonel T.E. Lawrence’s Arab forces to press further north and link up with Allenby’s army. Dalbiac does not tell us how many members of “Shea’s Force” were killed in action during this first major raid into Jordan, but he does say that between 22 March and 6 April 1918, 1,471 sick and 988 wounded – including Arab civilians and Turkish casualties – were evacuated across the Jordan by the three Field Ambulances at the force’s disposal.
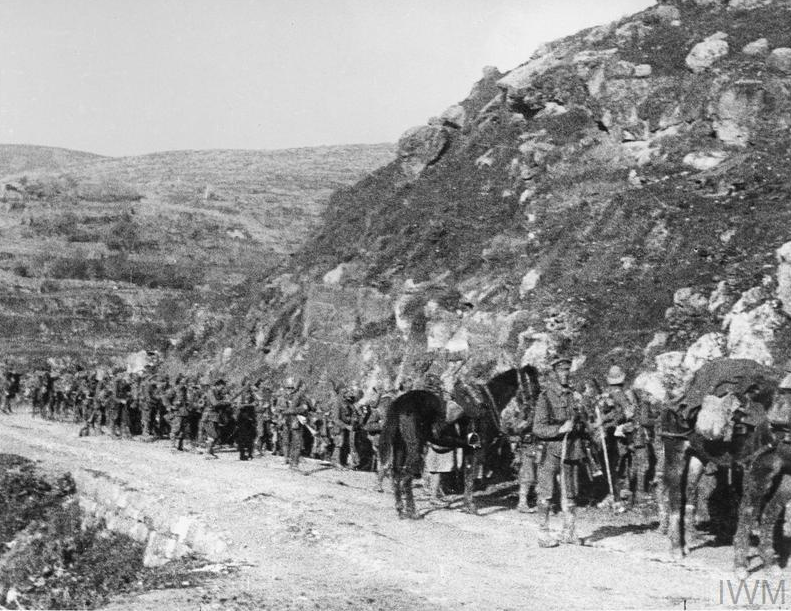
Troops of the 60th Division on the Es Salt Road March/April 1918
IWM Q65461
Once back on the west bank of the Jordan, Helme’s 2/16th Battalion continued its march to a point just one-and-a-half miles north-east of Jericho, where it stayed for two days. Then, on 4 April 1918, it marched nine-and-three-quarter miles to Talaat-ed-Dumm and on 6 April it began to march in a roughly north-by-north-westerly direction to Shafat, where it stayed until 9 April before continuing its march via Bireh and ‘Atara to the front-line trenches at the mountain village of Jiljilia. The Battalion stayed in the trenches here until 18 April; trained in the Jifna area – five miles north of Ramallah and c.14 miles north of Jerusalem – until 23 April; and then began to march back to Talaat-ed-Dumm, where it finally arrived on 27 April.
On 28 April the 2/16th Battalion marched down to the bridgehead at El Ghoraniyeh in order to participate in a second large raid across the Jordan which was to be carried out by the 179th and 180th Brigades, supported by part of the Desert Mounted Corps. So during the night of 28/29 April, the two Brigades crossed the River Jordan and for the whole of 29 April hid in the thick scrubland that was contained within the bridgehead in order to escape detection by enemy reconnaissance aircraft. At 02.30 hours on 30 April the 2/14th, 2/16th and 2/20th (Blackheath and Woolwich) Battalions were ordered to advance on the line El Haud–Wadi Arsenn’yet, with which they were already familiar from the first raid, and to take the ridge known as “Spectacle Hill”, while cavalry units surrounded Es Salt and tried to surprise the Turks from the rear, thus cutting off their line of retreat. According to the War Diary of Helme’s Battalion, the three Battalions accomplished this by 04.15 hours “at the point of the bayonet”.
Dalbiac’s account, however, suggests that the 2/16th Battalion only managed to reach the foothills of the ridge where, despite beating off a heavy Turkish counter-attack from the left, they were held back and pinned down by heavy machine-gun fire from well-prepared sangars and much stronger positions in the dominating hills to the north of the Wadi Arsenn’yet – on the ridges known as “Bruce” and “Rifle Ridge”, as well as near El Haud. At first the 2/14th Battalion fared better, with its ‘C’ Company taking “Spectacle Hill”, while ‘A’ and ‘B’ Companies took cover in the low ground to the south, but ‘D’ Company, the Battalion Reserve, was decimated by well-placed machine-gun fire when it tried to move up in support. While this was going on, the mounted troops took Es Salt, almost capturing the HQ of the Fourth Turkish Army as they did so. But on 1 May they came close to being cut off and retired, as did the other cavalry units who were guarding the left flank of the infantry on “Spectacle Hill”. Then, at 05.30 hours on 2 May, the Turks attacked the Allied positions on “Rifle Ridge” in force, and it became obvious that their strength had been badly under-estimated and that a general withdrawal was necessary. The cavalry units left on 3 May and the 181st Brigade crossed to the east bank of the Jordan to cover the retreat of the other two Brigades, which crossed to the river’s west bank just before dawn on 4 May. Just over a month later, seven of the 60th Division’s most experienced Battalions were replaced by units of the Indian Army and began their transfer to the Western Front.
The second raid into Jordan cost the 2/16th Battalion seven officers and 96 ORs killed and wounded, bringing its fighting strength down from 25 officers and 670 ORs to 18 officers and 569 ORs, but the 2/14th, 2/15th and 2/20th Battalions had fared considerably worse. Helme was wounded near Es Salt on 30 April 1918, when a bullet from the left went through his abdomen, tracked across his pelvis, and emerged through his right buttock. He was taken first to a hospital in Gaza, but after being discharged on 20 June 1918 and given light duties as the Assistant Camp Commandant at the plush Savoy Hotel in Cairo, he found that continuing pain and the secondary effects of the wound were preventing him from doing the work. So on 21 August 1918, a Medical Board advised that he be sent back to Britain by Hospital Ship for better treatment and Helme finally left Egypt on 19 September. He was admitted to the Prince of Wales’s Hospital, Marylebone, on 29 September, where he was considered to be 50 per cent disabled, and in October 1918 it was calculated that if he were to recover properly, he would need ten months’ leave and complete freedom from military duties. But he contracted influenza during the pandemic of 1918–19 which killed an estimated 50–100 million people worldwide, and when this was followed by a bout of pneumonia, he died, already weakened by his wound, on 3 November 1918, aged 35, in the Hamilton Auxiliary (Convalescent) Hospital for Officers at 75 Harrington Gardens, South Kensington, London SE7, that had been opened in April 1918.
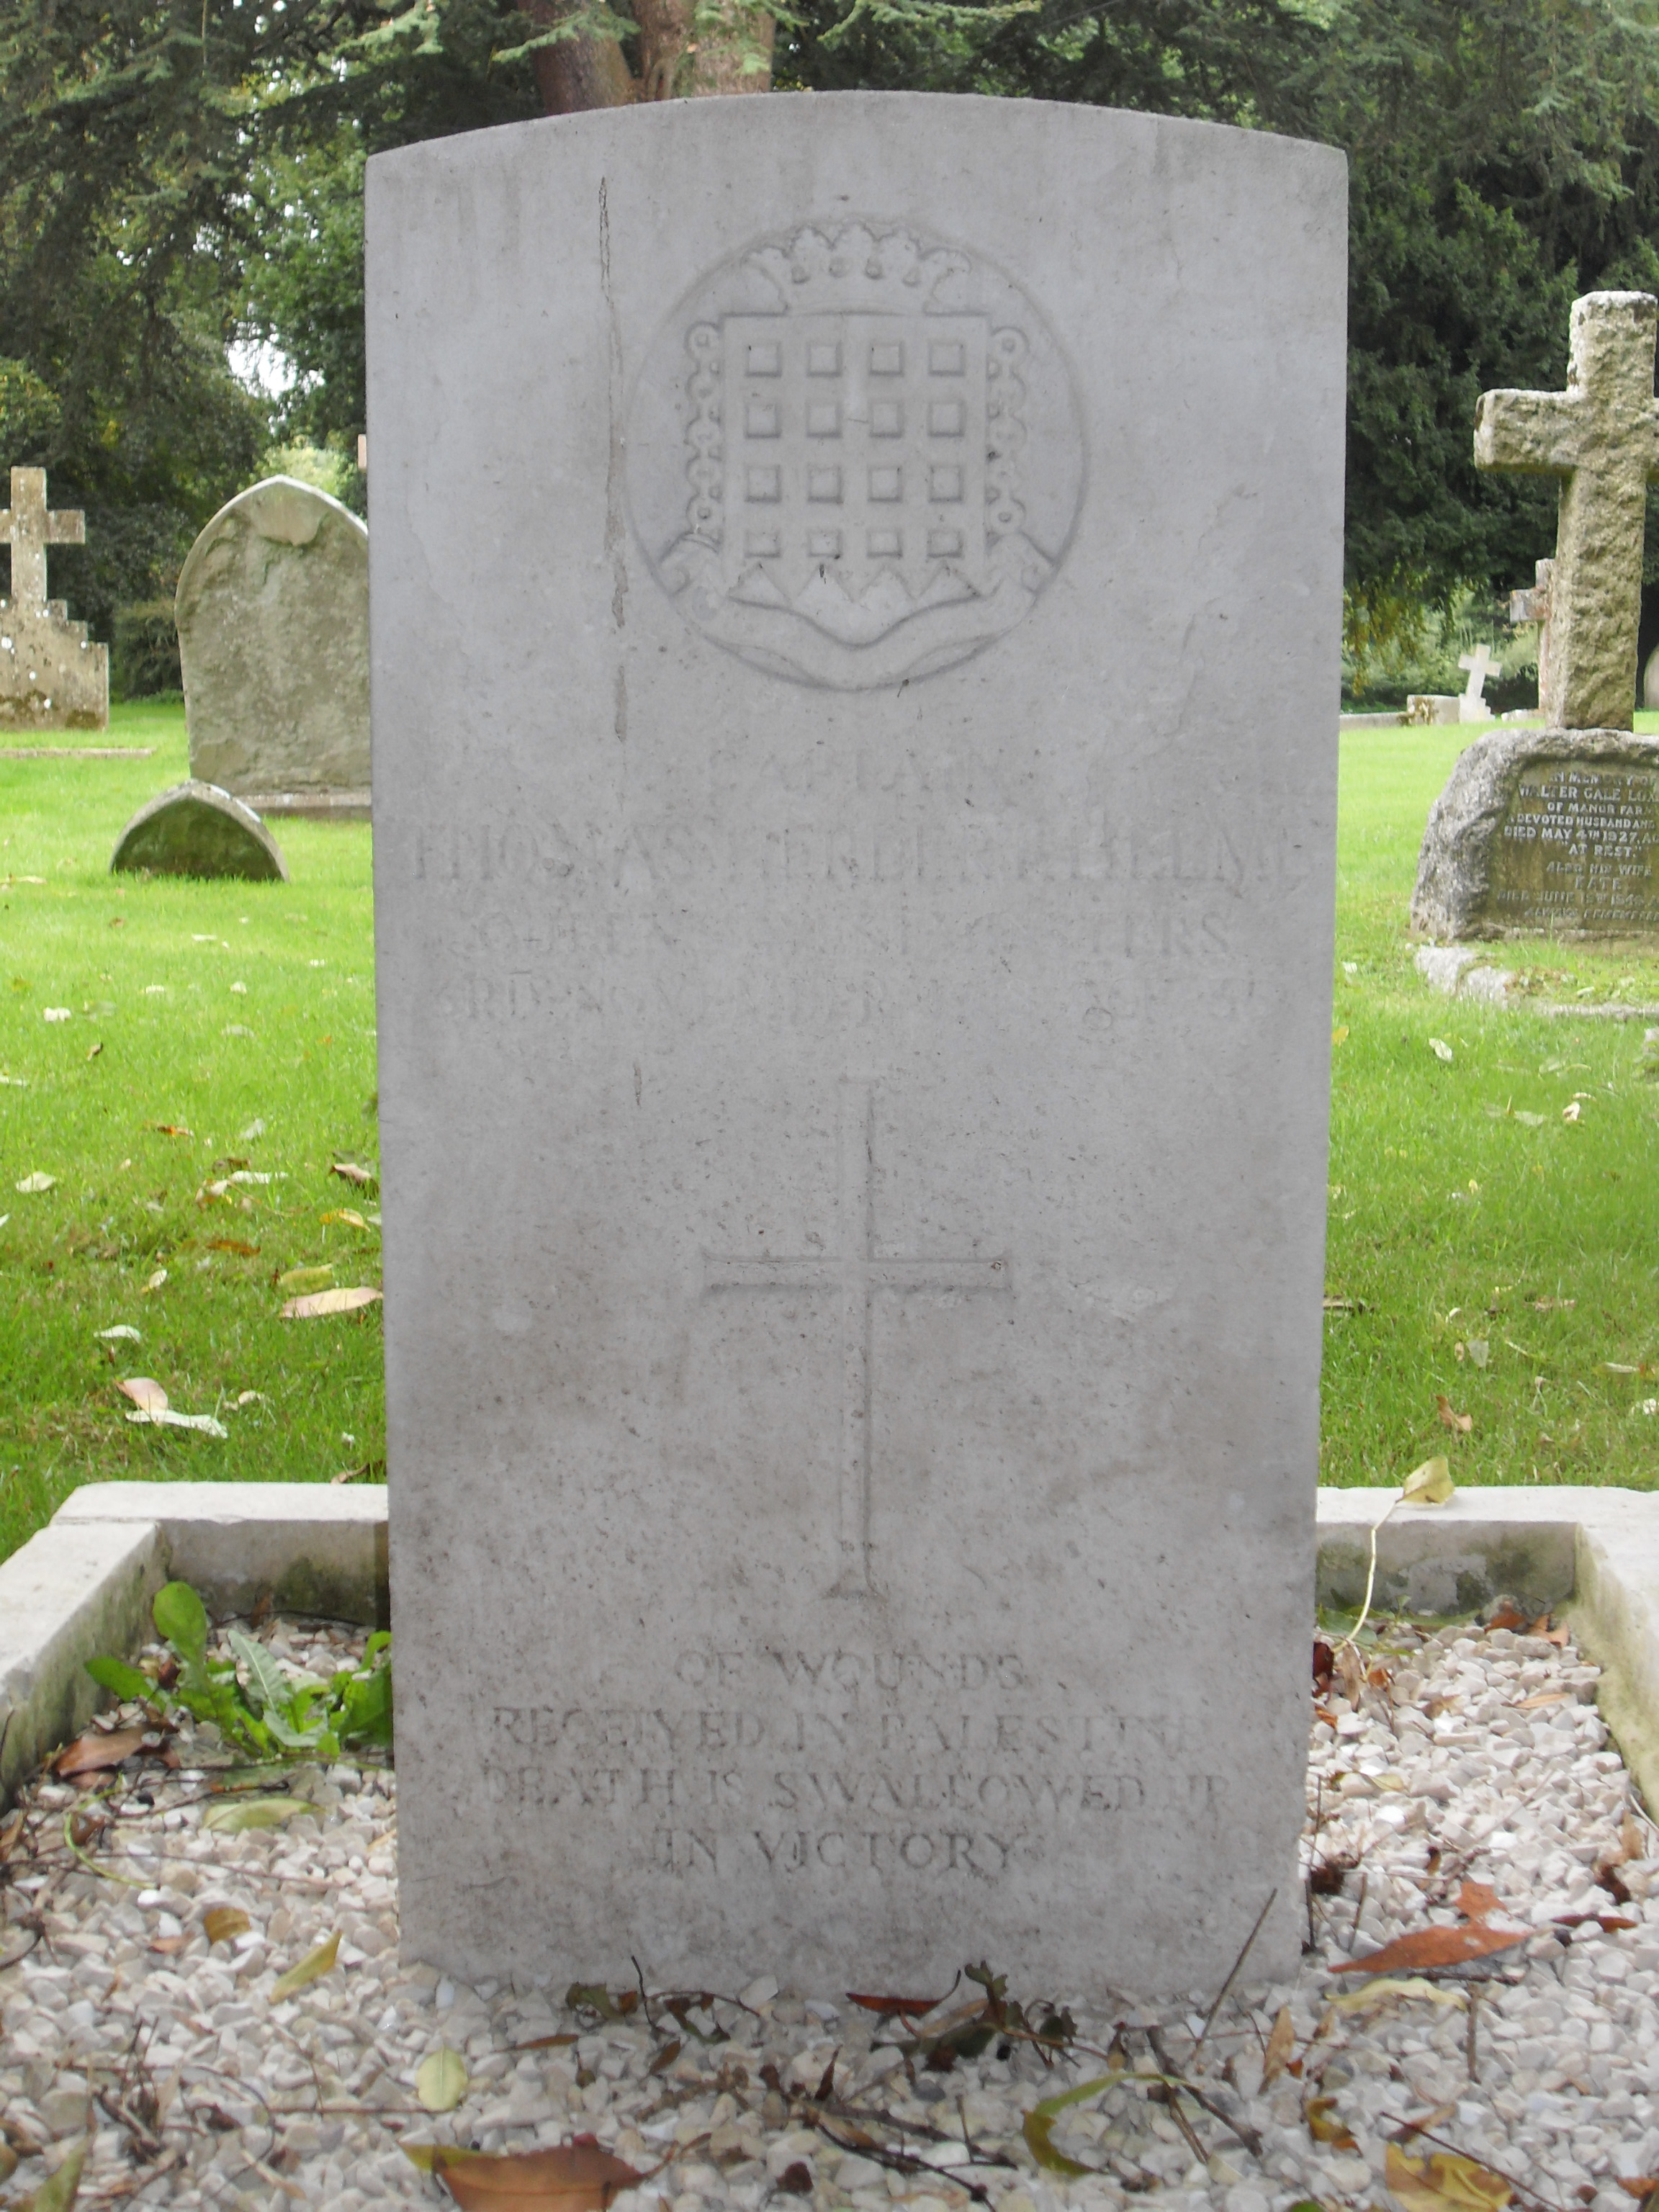
Helme’s unnumbered grave (north-east of the church, near the church); Little Bookham Churchyard, Surrey.
Helme is buried in an unnumbered grave in All Saints Churchyard, Little Bookham (north-east of the church, near the hedge), Surrey; the inscription reads “Of wounds received in Palestine. Death is swallowed up in Victory” (1 Corinthians 15:54). He is commemorated on Worthing War Memorial, West Sussex; on the memorial (a wooden board on the north wall) inside St Andrew’s Parish Church, West Tarring, near Worthing, West Sussex; on the memorial to the dead of both world wars and in the Memorial Book which Barclays Bank has in its Head Office at 54 Lombard Street, London EC3; and on the memorial in Lord’s Cricket Ground to members of the Marylebone Cricket Club who were killed in action in World War One. He left £4,410 0s. 1d.
Bibliography
For the books and archives referred to here in short form, refer to the Slow Dusk Bibliography and Archival Sources.
Special acknowledgements:
The authors wish to acknowledge the extensive and invaluable help they have received from the following three publications:
** Philip Hugh Dalbiac, History of the 60th Division (2/2nd London Division), (London: George Allen & Unwin Ltd, 1927), pp. 17–222, passim.
*Alan Wakefield and Simon Moody, Under the Devil’s Eye: The British Military Experiences in Macedonia 1915–18 (2004) (Barnsley: Pen & Sword Military, 2011), pp. 3–33, 61–3, 86, 96.
*Charles H. Whitwood, ‘The Mashiter Family of Romford’, Romford Record [typescript, courtesy of Mr Phil Steer of the Romford and District Historical Society, Essex], 6 (1974), pp. 14–20.
Printed sources:
‘Will of Mr T[homas] Mashiter’, The Morning Post (London), no. 38,917 (1 March 1897), p. 6.
Obit. of Thomas Mashiter né Helme, Essex Review, 6 (1897), p. 8.
W.E. Hitchin, Surrey at the Opening of the Twentieth Century (Pike’s New Century Series) (Brighton: W.T. Pike & Co., 1906), p. 145.
Horace Kent: Who’s Who in Kent, Surrey & Sussex (Cox’s County Series) (London: Horace Cox “Field” Office, 1911), p. 204.
[Anon.], ‘Captain Thomas Herbert Helme …’ [obituary], The Times, no. 41,953 (21 November 1918), p. 4.
[Anon.], ‘Died on Sunday, November 3 …’ [death notice], The Oxford Magazine, 38, no. 8 (6 December 1918), p. 120.
Obit. of Edward Thomas Mashiter né Helme, Essex Review, 30 (1921), pp. 109–10.
[Anon.], ‘Sir George Coope Mashiter’ [obituary], The Wiltshire Gazette, no. 5,195 (18 August 1927), p. 5.
Ernest May, Signal Corporal: The Story of the 2nd Battalion London Irish Rifles [2/18th] in the First World War (London: Johnson Publications Ltd, 1972).
Mark Lloyd, The London Scottish in the Great War (Barnsley: Leo Cooper, 2001), pp. 182–7, 200–32.
Jill Knight, Civil Service Rifles in the Great War: ‘All Bloody Gentlemen’ (Barnsley: Leo Cooper, 2004), pp. 154–203.
Roger Ford, Eden to Armageddon: World War I in the Middle East (London: Phoenix Paperbacks [Orion Books Ltd], 2010), pp. 342, 355–57, 368, 372–6.
Ian Webster, Ind Coope and Samuel Allsopp Breweries: The History of the Hand (Stroud: Amberley Publishing, 2015), esp. pp. 33–40 [reviewed by Martyn Cornell in: Brewery History, no. 164 (Winter 2015), pp. 76–9; on-line at http://www.breweryhistory.com/journal/archive/164/BookReviews 164.pdf].
Archival sources:
Barclays Group Archives, Dallimore Road, Wythenshawe, Manchester.
Essex Record Office, Catalogue: D/DU 1096, ‘Papers relating to Octavius Edward Coope, MP’. See Essex Archives Online: https://www.essexarchivesonline.co.uk/result_details.aspx?ThisRecordsOffSet=1&id=824605 .
Essex Record Office, Catalogue: D/DU 2708, ‘The Albums of Edward T. Mashiter né Helme’. See Essex Archives Online: https://www.essexarchivesonline.co.uk/result_details.aspx?ThisRecordsOffSet=1&id=1003253 .
MCA: Ms. 876 (III), Vol. 2.
OUA: UR 2/1/48.
PROB 11/1044/7 (National Archives: Thomas Mashiter, Merchant of Romford, 1 July 1778).
PROB 11/1841/305 (National Archives: Blandina[h] Mashiter, Widow of Romford, 7 January 1835).
WO95/2340/4.
WO95/3030/6.
WO95/4668.
WO95/4928.
WO374/32492.
On-line sources:
[illustrated article on Ind Coope]: http://www.midlandspubs.co.uk/breweries/staffordshire/ind-coope.htm (accessed 20 February 2022).
‘Beersheba and Beyond – Palestine 1917’ (collection of historic photographs, © Elizabeth Barsham): https://tasmaniangothic.wordpress.com/world-war-1/beersheba-and-beyond-palestine-1917/ (accessed 20 February 2022).
‘Sinai and Palestine Campaign’, Fandom Military: https://military-history.fandom.com/wiki/Sinai_and_Palestine_Campaign (accessed 20 February 2022).
Wikipedia, ‘Allied Army of the Orient’: https://en.wikipedia.org/wiki/Allied_Army_of_the_Orient (accessed 20 February 2022).
Wikipedia, ‘Battle of Beersheba (1917)’: https://en.wikipedia.org/wiki/Battle_of_Beersheba_(1917) (accessed 20 February 2022).
Wikipedia, ‘Battle of Hareira and Sheria’: https://en.wikipedia.org/wiki/Battle_of_Hareira_and_Sheria (accessed 20 February 2022).
Wikipedia, ‘Battle of Jerusalem’: https://en.wikipedia.org/wiki/Battle_of_Jerusalem (accessed 20 February 2022).
Wikipedia, ‘Battle of Kosturino’: https://en.wikipedia.org/wiki/Battle_of_Kosturino (accessed 20 February 2022).
Wikipedia, ‘Battle of Monastir’ (1917): https://en.wikipedia.org/wiki/Battle_of_Monastir (accessed 20 February 2022).
Wikipedia, ‘Battle of Mughar Ridge’: https://en.wikipedia.org/wiki/Battle_of_Mughar_Ridge (accessed 20 February 2022).
Wikipedia, ‘Battle of Nebi Samwil’: https://en.wikipedia.org/wiki/Battle_of_Nebi_Samwil (accessed 20 February 2022).
Wikipedia, ‘Battle of Tell ‘Asur’: https://en.wikipedia.org/wiki/Battle_of_Tell_%27Asur (accessed 20 February 2022).
Wikipedia, ‘Battle of Tel-el-Khuweilfe’: https://en.wikipedia.org/wiki/Battle_of_Tel_el_Khuweilfe (accessed 20 February 2022).
Wikipedia, ‘Capture of Jericho’: https://en.wikipedia.org/wiki/Capture_of_Jericho (accessed 20 February 2022).
Wikipedia, ‘Charge at Huj’: https://en.wikipedia.org/wiki/Charge_at_Huj (accessed 20 February 2022).
Wikipedia, ‘East London Waterworks Company’: https://en.wikipedia.org/wiki/East_London_Waterworks_Company (accessed 20 February 2022).
Wikipedia, ‘Eleftherios Venizelos’: https://en.wikipedia.org/wiki/Eleftherios_Venizelos (accessed 20 February 2022).
Wikipedia, ‘First Transjordan Attack on Amman’: https://en.wikipedia.org/wiki/First_Transjordan_attack_on_Amman (accessed 20 February 2022).
Wikipedia, ‘Monastir Offensive’: https://en.wikipedia.org/wiki/Monastir_offensive (accessed 20 February 2022).
Wikipedia, ‘Second Battle of Gaza’: https://en.wikipedia.org/wiki/Second_Battle_of_Gaza (accessed 20 February 2022).
Wikipedia, ‘Southern Palestine Offensive’: https://en.wikipedia.org/wiki/Southern_Palestine_offensive (accessed 20 February 2022).
Wikipedia, ‘Stalemate in Southern Palestine’: https://en.wikipedia.org/wiki/Stalemate_in_Southern_Palestine (accessed 20 February 2022).